
I can be a bit of a worrier and used to spend time fretting about what pressure was in my keg and whether my hard earned brew was spoiling or not. I decided to find a way of monitoring the pressure. Following the recommendations of another forum member I decided to fit tyre valves to my keg lids. My local tyre shop was very helpful and gave me a few for now’t as they are only pennies to buy. I drilled 12mm holes in the caps and pulled the rubber valves into place using plenty of washing up liquid for lubrication. You can also buy valves with a locking nut on the bottom which are even easier to fit. This worked really well and it was easy to measure the pressure using a cheap digital tyre pressure gauge from Hellfrauds. The added advantage with tyre valves is that you can use them to vent excess pressure without disturbing the cap.
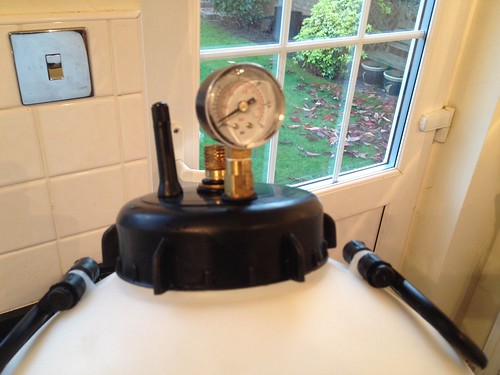
A couple of brews later I happened upon some low pressure dial gauges on ebay. I can’t remember the cost but I think they were around £13 each. I decided to keep the tyre valves and added the gauges to the cap too.

image by Wezzell, on Flickr
King Keg by Wezzell, on Flickr
I also changed the taps to these which were less than a fiver and offer much better control over the standard drum taps.
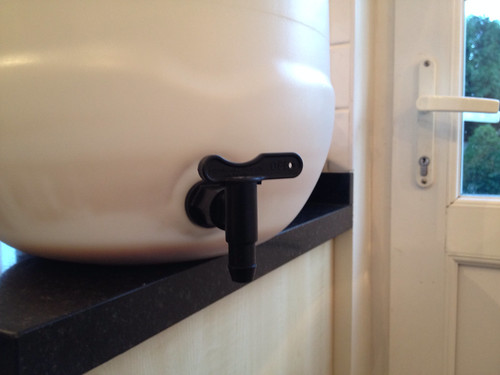
image by Wezzell, on Flickr
My kegging routine is now as follows:
Prime the brew (23 – 25 litres) with 85 gms of dextrose.
Wrap 10 – 15 turns of ptfe tape around the keg threads.
Lightly grease the o-ring with Vaseline.
Screw the cap on hand tight.
Give the keg a squirt of Co2 from the S30 bottle to pressurise to about 5 psi.
Wait for approximately 30 minutes to check that the keg is holding pressure. If the needle is dropping I will tighten in small increments until I know I have a good seal.
I will then vent off excess Co2 and unwanted air using the tyre valve to 1 psi and put the keg in the brew fridge at about 19 degrees to carb up.
After about 7 days the pressure is normally at about 10 psi. At this point I drop the temperature to cellar temperature (about 12 or 13 degrees) for conditioning. I’ve noticed that pressure does still build even at cellar temperature albeit slowly (0.2 – 0.3 psi per day) but it is easy to vent excess pressure using the tyre valve. Incidentally, I wouldn’t put too much trust in the pressure relief valve as I once found mine at 15 psi with no sign of letting up.
I realise that these additions put up the overall cost and shouldn’t be necessary but in my mind well worth it for the peace of mind.

