Complete Brew including set up, Brew Day and Packaging
Posted: Tue Aug 06, 2013 11:21 am
Over on another thread there was a bit of lamentation over the "disappearance" of some of the well known names on the forum and a hope that their experience and wisdom is not lost for ever. It was pointed out that some people stop posting because they think that they may have said all they have to say and don't want to keep answering the same old questions. I must admit having posted a few brew days now I was beginning to think that no one was really interested to see another one from me, particularly as I didn't think I had much to add. But it was pointed out that people join all the time and it is useful as it may inspire someone to make a new step or investigate a technique, so here goes.
I decided I would try and document everything I have done for this brew day. Unfortunately the 4 month old yeast slant I chose for the brew was started a few days ago so I can't show that part but at least can start with how I prep for a brew. This first set of pictures then is what I do before a brew day 24 hours in advance.
Two reasons for the advance work are:
1) I treat the water and this gives the water a chance to rid itself of chloramines with the help of crushed campden tablet (1/2, split 1/3 mash water 2/3 sparge water). You should also add acids to cold water and I set up the HLT when I make the early morning coffee then go back to bed Sparge water is then up to temp and I can get the mash on and go and have breakfast-also washing the dog tomorrow-whilst the mash does its thing.
2) By preparing the water & the grains in advance it helps to reduce the length of the brewday.
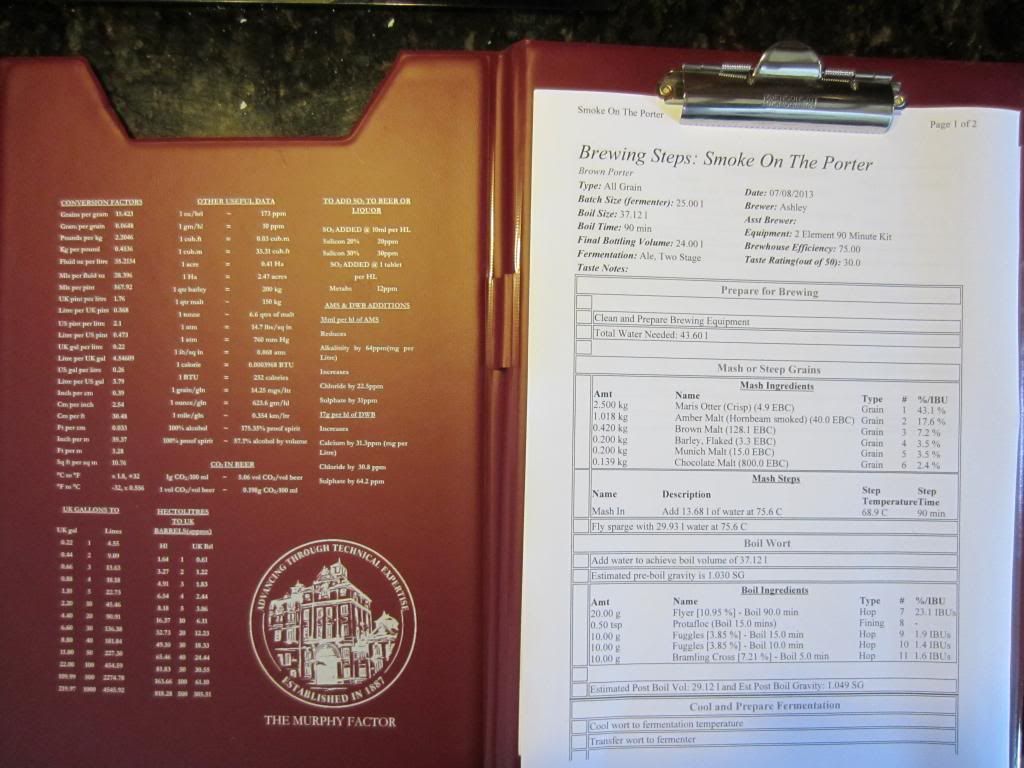
OK so first things first, the recipe. I am making a Porter, this will have in it some 19c style "snapped" Amber malt made for me by Fuggledog, this is diffeernt to standard Amber as it is done so it still has some diastatic power, I am using MO so not relying on it to convert itself but nevertheless worth mentioning as I intend to brew an Amber with just this in the future as an experiment.
Here is the recipe: Because of the "Hornbeam smoked malt" and to fit the music theme of all my beers it inevitably had to be called "Smoke On The Porter"
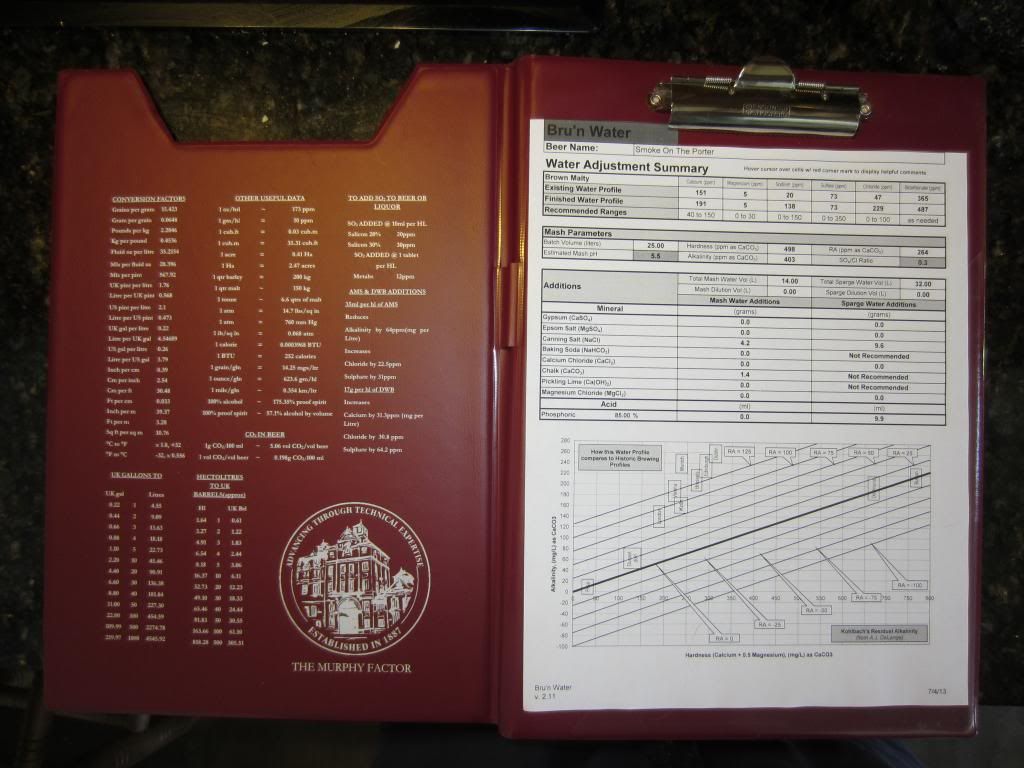
This next picture shows the water treatment schedule. Notice that there is no acidification of the mash water because my water is hard as fuke, but note that it is still not hard enough for all these dark grains, their acidification is such that I have had to actually add some chalk in order to get the pH in the range I want. Also of note is how the usual sulphate to chloride ratio (73:229) is almost opposite to a standard bitter.
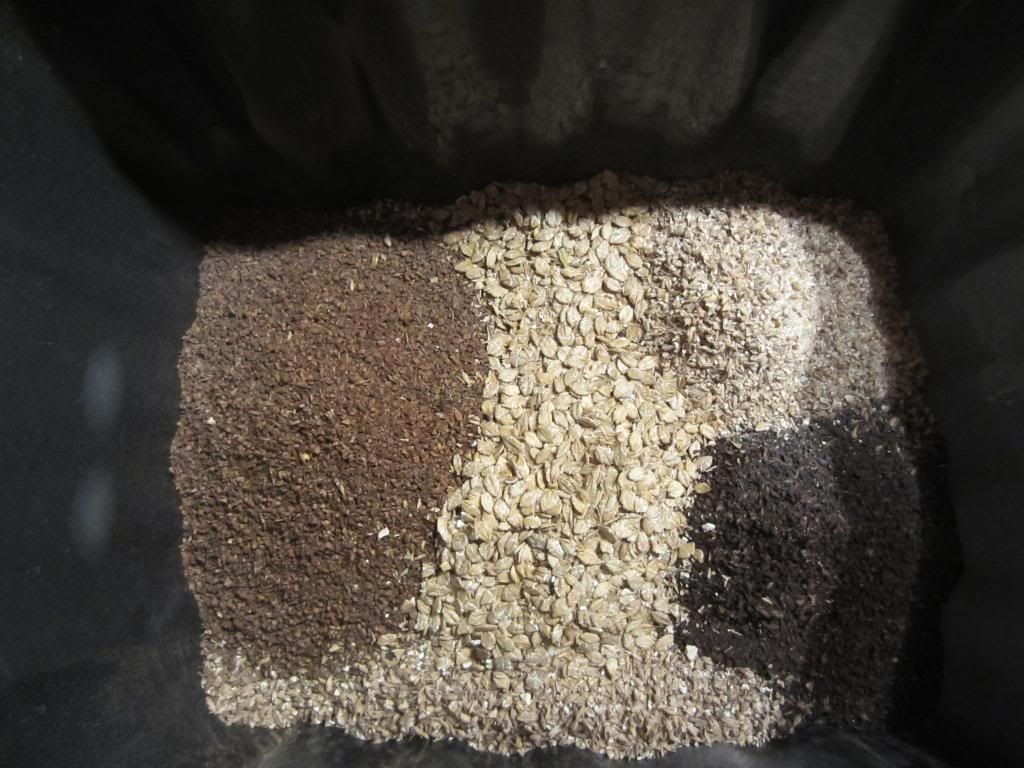
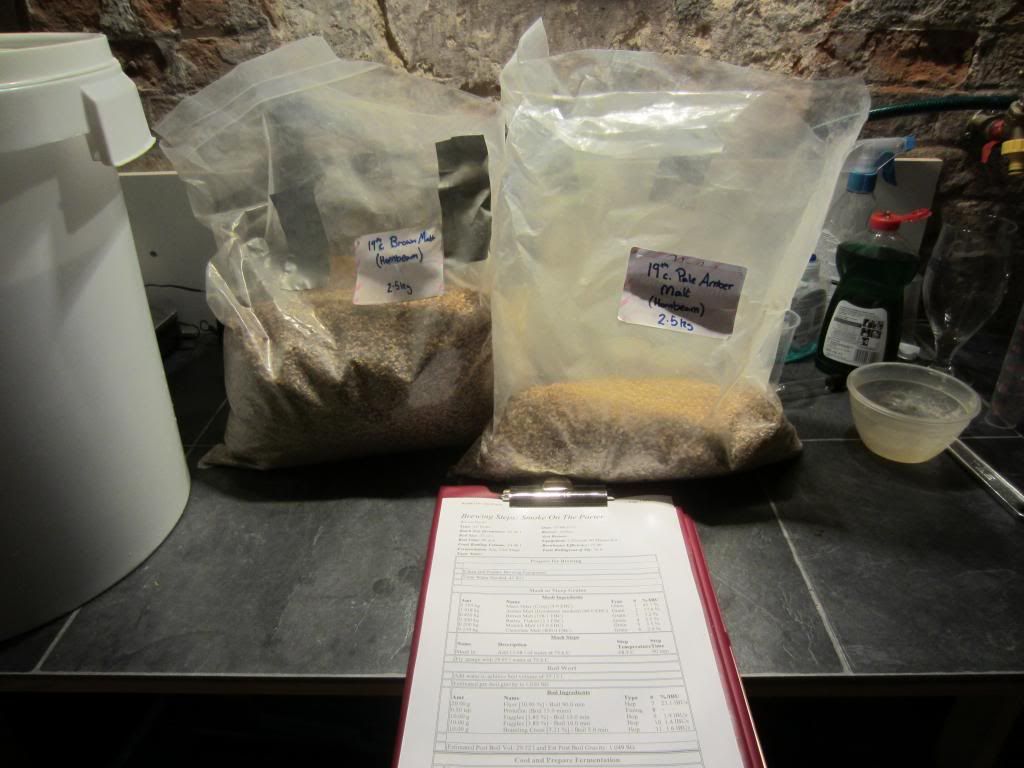
Grist shot with all those lovely dark grains.
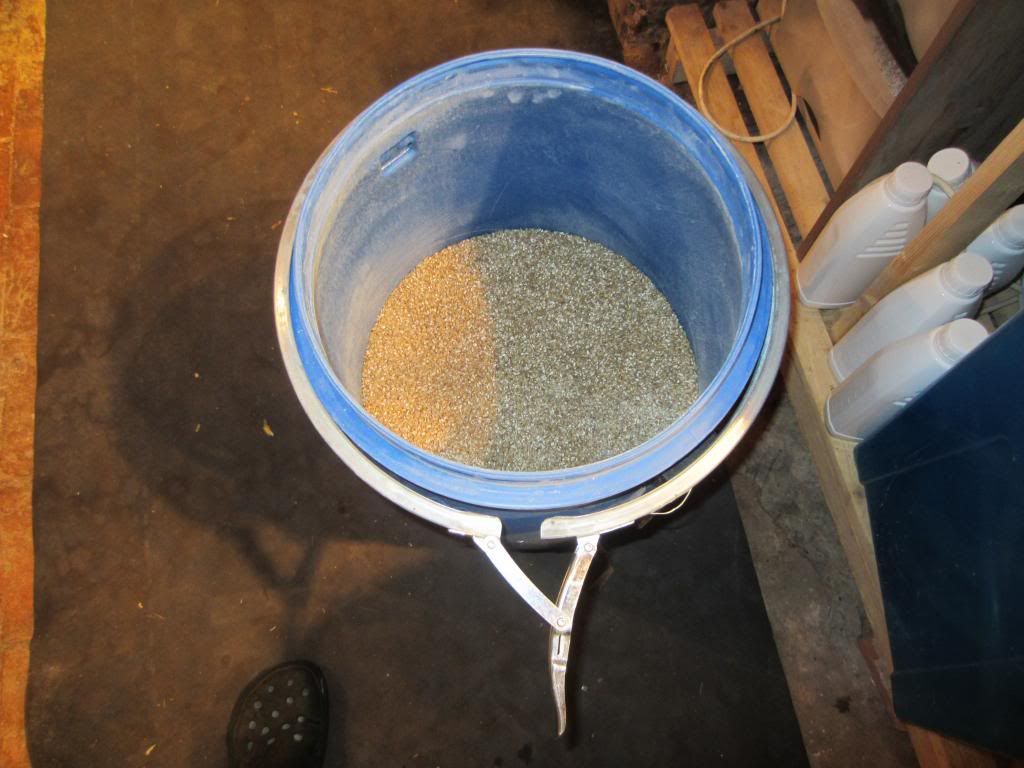
This is the storage bin I use for base malt, you can't smell this until the sealed lid is removed, will keep malt for a long time, not that mine lasts a long time .
A shot of a couple of hornbeam smoked malts. Only using the Amber today.
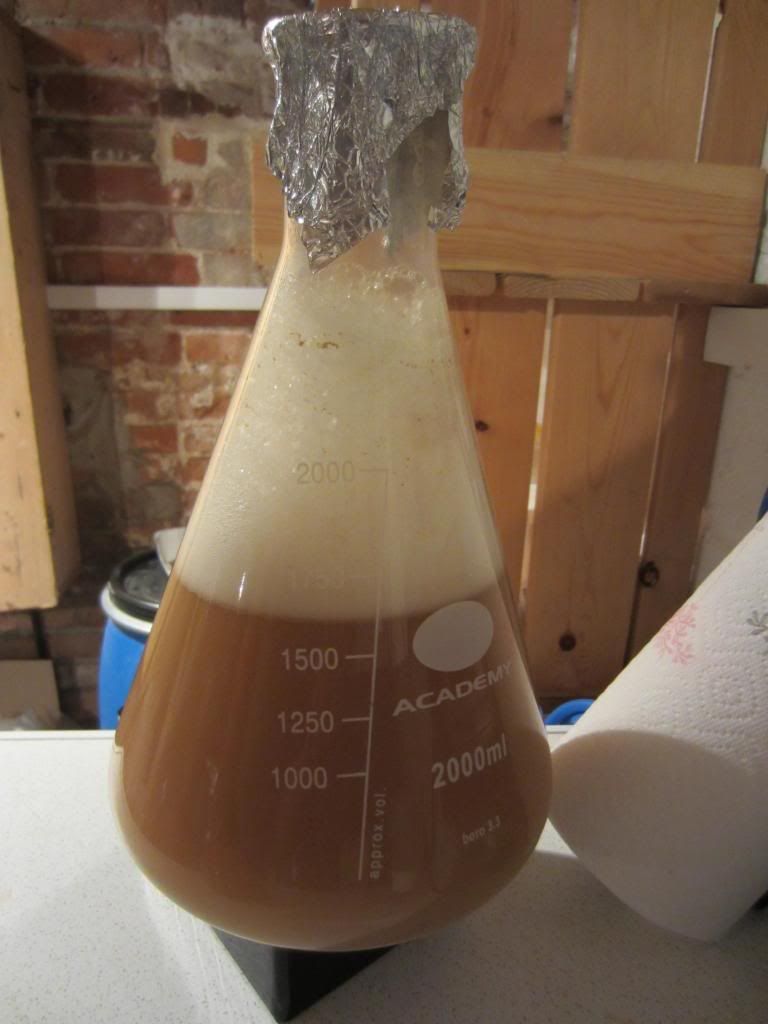
Starter on the stir plate, bit warm in the cellar so it is starting to ferment rather than replicate, taken it off and now chilling in the fridge, will decant off the DME wort before bringing back up to pitching temps.
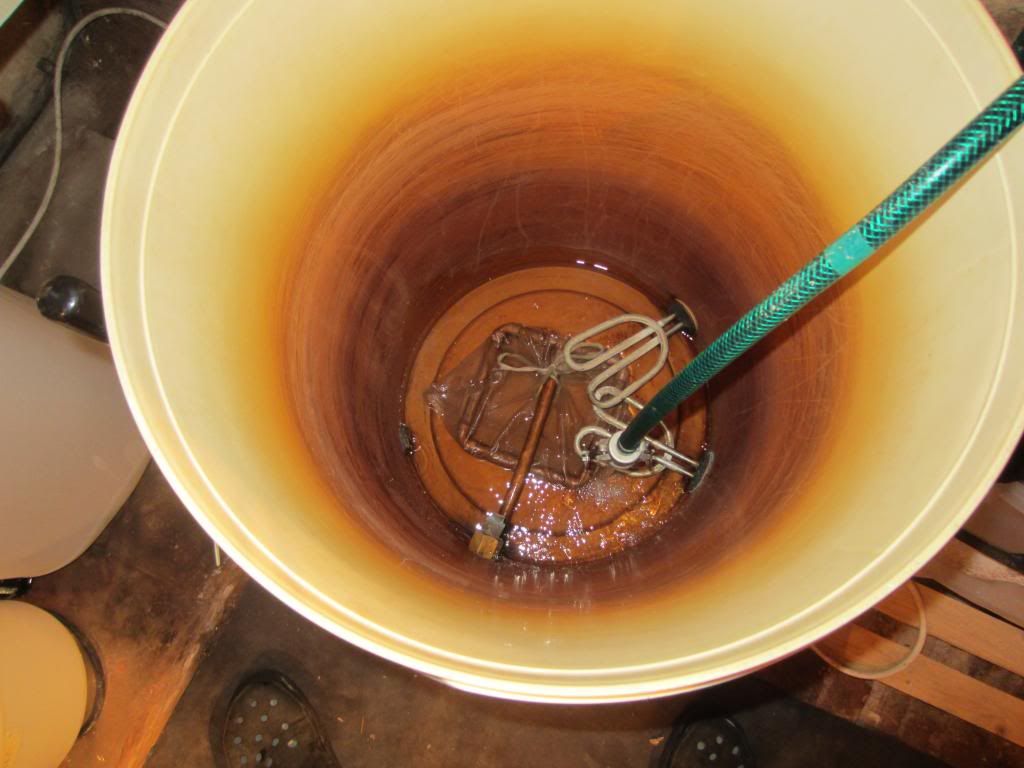
Just about the most tedious picture of an HLT with mash water in it and table salt (chloride). Note brew shoes and filthy wort stained brew mat .
.
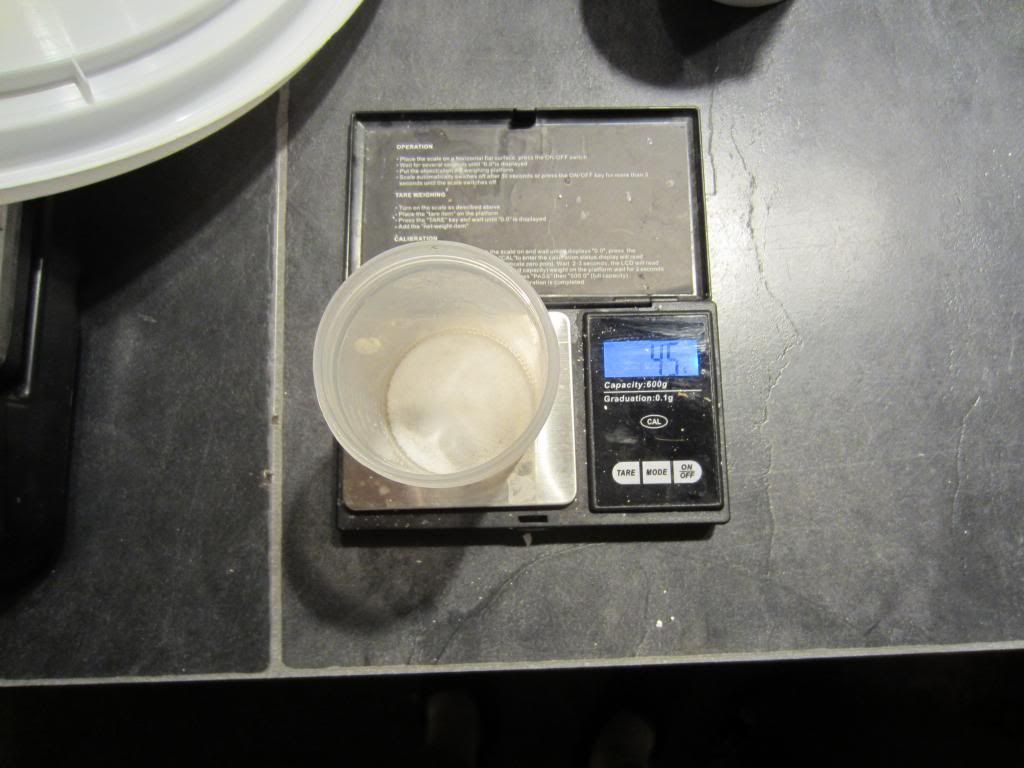
Use of the gram scales to measure the salt for the mash water.
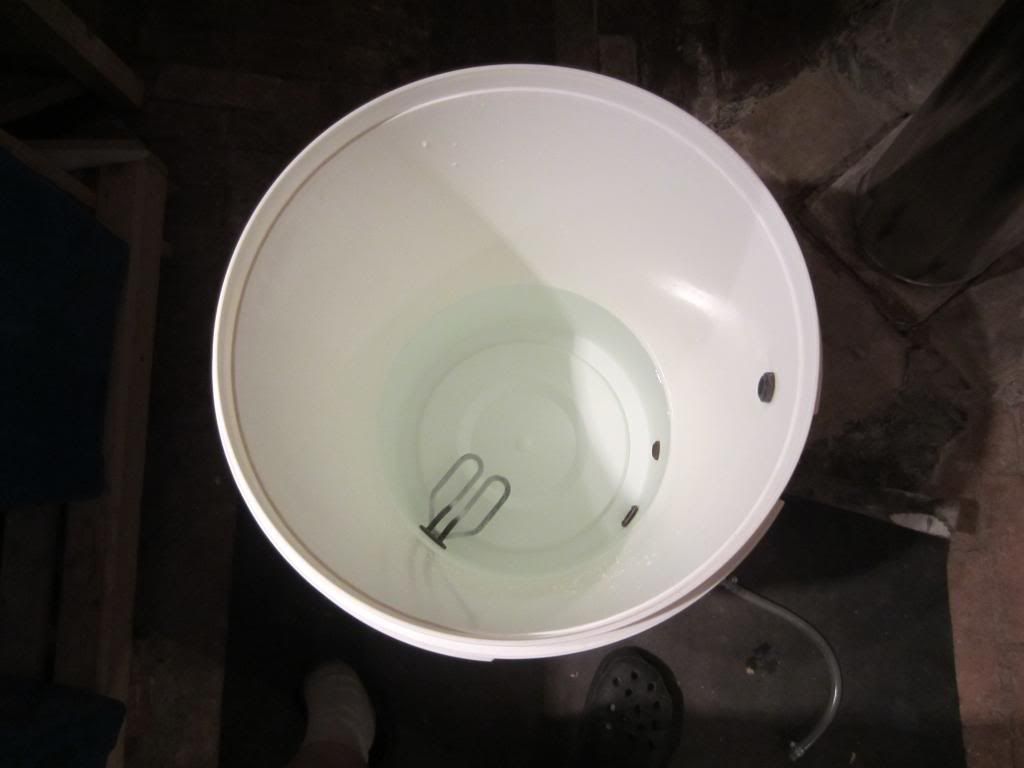
Picture of the sparge water being put into my boiler, note the hop sock is already in place over the manifold hop stopper, helps protect my plate chiller when it comes to run off and contributes to fabulous clarity. I will begin to heat this the moment I start the brewday then pump it up, using the mighty solar pump, up to my HLT once the mash is on.
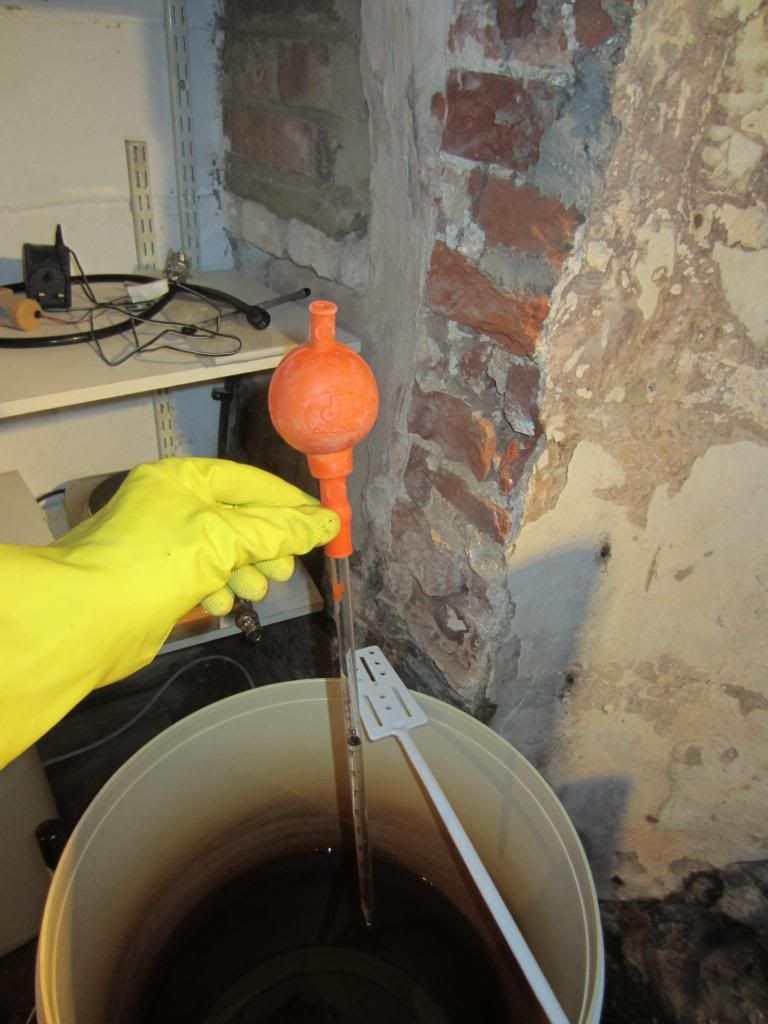
Final stage of the prep is to acidify the liquour. For this brewday it is only the sparge water that is being acidified. This brew is an answer to the question, "why not acidify all the water in one go?". The answer to that has already been alluded too, because I am brewing a dark beer with a heavy reliance on highly roasted grains the acidification effect on the mash is so high I have even had to add chalk to counteract it, if I had acidified the mash water too my pH would be so low it would potentially ruin the beer. A precautionary piece of advice for those thinking of water treatment and using the Bru'n water calculator.
This picture shows the acid and the graduated pipette. The bulb is rather clever and allows you to very precisely suck up the acid you need and gently dispense into the liquour. ALWAYS this way round!

This picture doesn't show the full chemical suit, face mask and phone with 999 already plumbed in and ready to go. Only kidding, phosphoric won't melt your face and eyes just from the fumes like some other acids used. .
Ok, that's it for now. I will post the brewday pictures as soon as I can. I am travelling up to Hexham, Northumberland and a visit to Fuggledog straight after, so it might be a day or so until I can. Bear with
I decided I would try and document everything I have done for this brew day. Unfortunately the 4 month old yeast slant I chose for the brew was started a few days ago so I can't show that part but at least can start with how I prep for a brew. This first set of pictures then is what I do before a brew day 24 hours in advance.
Two reasons for the advance work are:
1) I treat the water and this gives the water a chance to rid itself of chloramines with the help of crushed campden tablet (1/2, split 1/3 mash water 2/3 sparge water). You should also add acids to cold water and I set up the HLT when I make the early morning coffee then go back to bed
2) By preparing the water & the grains in advance it helps to reduce the length of the brewday.
OK so first things first, the recipe. I am making a Porter, this will have in it some 19c style "snapped" Amber malt made for me by Fuggledog, this is diffeernt to standard Amber as it is done so it still has some diastatic power, I am using MO so not relying on it to convert itself but nevertheless worth mentioning as I intend to brew an Amber with just this in the future as an experiment.
Here is the recipe: Because of the "Hornbeam smoked malt" and to fit the music theme of all my beers it inevitably had to be called "Smoke On The Porter"

This next picture shows the water treatment schedule. Notice that there is no acidification of the mash water because my water is hard as fuke, but note that it is still not hard enough for all these dark grains, their acidification is such that I have had to actually add some chalk in order to get the pH in the range I want. Also of note is how the usual sulphate to chloride ratio (73:229) is almost opposite to a standard bitter.

Grist shot with all those lovely dark grains.

This is the storage bin I use for base malt, you can't smell this until the sealed lid is removed, will keep malt for a long time, not that mine lasts a long time

A shot of a couple of hornbeam smoked malts. Only using the Amber today.

Starter on the stir plate, bit warm in the cellar so it is starting to ferment rather than replicate, taken it off and now chilling in the fridge, will decant off the DME wort before bringing back up to pitching temps.

Just about the most tedious picture of an HLT with mash water in it and table salt (chloride). Note brew shoes and filthy wort stained brew mat

Use of the gram scales to measure the salt for the mash water.

Picture of the sparge water being put into my boiler, note the hop sock is already in place over the manifold hop stopper, helps protect my plate chiller when it comes to run off and contributes to fabulous clarity. I will begin to heat this the moment I start the brewday then pump it up, using the mighty solar pump, up to my HLT once the mash is on.

Final stage of the prep is to acidify the liquour. For this brewday it is only the sparge water that is being acidified. This brew is an answer to the question, "why not acidify all the water in one go?". The answer to that has already been alluded too, because I am brewing a dark beer with a heavy reliance on highly roasted grains the acidification effect on the mash is so high I have even had to add chalk to counteract it, if I had acidified the mash water too my pH would be so low it would potentially ruin the beer. A precautionary piece of advice for those thinking of water treatment and using the Bru'n water calculator.
This picture shows the acid and the graduated pipette. The bulb is rather clever and allows you to very precisely suck up the acid you need and gently dispense into the liquour. ALWAYS this way round!

This picture doesn't show the full chemical suit, face mask and phone with 999 already plumbed in and ready to go. Only kidding, phosphoric won't melt your face and eyes just from the fumes like some other acids used.

Ok, that's it for now. I will post the brewday pictures as soon as I can. I am travelling up to Hexham, Northumberland and a visit to Fuggledog straight after, so it might be a day or so until I can. Bear with


