Serious conversion possibilities here. I had been gradually saving up for the Nordic thermobox sort of thing, then when I had the chance to get four stainless casks, legally, with provenance, I just went "Gulp!" and wrote a cheque.
Mr Hammond had used one of the casks already as his mash tun. I'm not ready to go to fifty-litre batches yet, so my first priority was a bigger HLT. With the 20-something litres in the Electrim boiler I have run out of sparge liquor more than once.
Rather than risk knackering the one cask which had been converted already, I thought I would hack-up another one from scratch. I cut a circle in the top with my Bosch jigsaw (got through four blades!) the right size to take a large saucepan lid from the kitchen. (Sorry, no pictures). I used some spray cutting compound. It got really difficult when I was cutting both the end of the cask and a sheet stainless label which had been spot-welded to it.
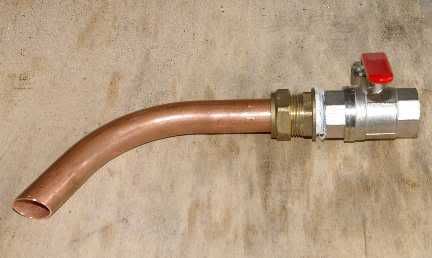
The keystone (just the metal hole, without the plastic plug) is the right size to pass a 3/4" BSP fitting, so I could use the ballvalve, running nipple, and pair of flanged hex nuts from BES like I have on my plastic boilers.
I had to cut a 40mm hole for a kettle element, and managed to kill a Bosch cobalt holesaw in doing so. The cask wasn't stable while I was drilling the hole, so I may have wobbled around a bit, and burned the teeth off the holesaw. The cutting oil just wasn't up to the job here. I had to finish the hole with the jigsaw, then file it smooth, and wet-and-dry it until it wasn't sharp.
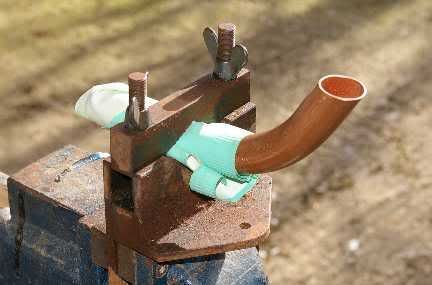
Before I made the holes for the sight tube (polycarbonate tube and JG fittings from Garth - thanks very much!) I needed a way of anchoring the cask so it wouldn't walk around while I drilled. Four pieces of scrap wood:
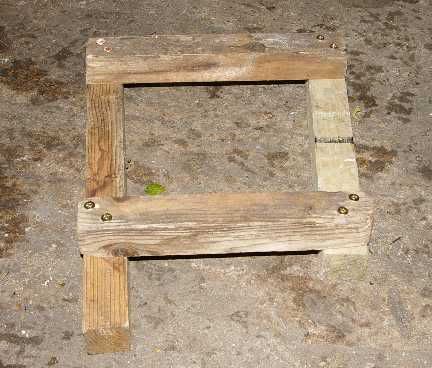
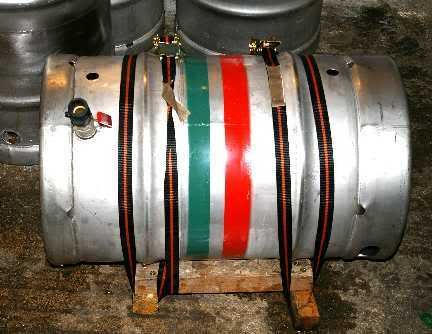
...make a cradle onto which I can strap the cask using my high-quality roof-rack straps from Lidl:
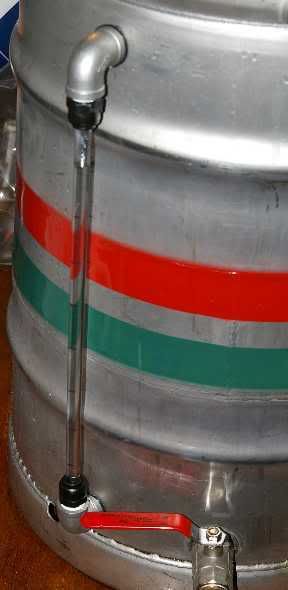
You can see the two holes for the sight tube fittings, not quite in a straight line
Here's the sight tube fitted:
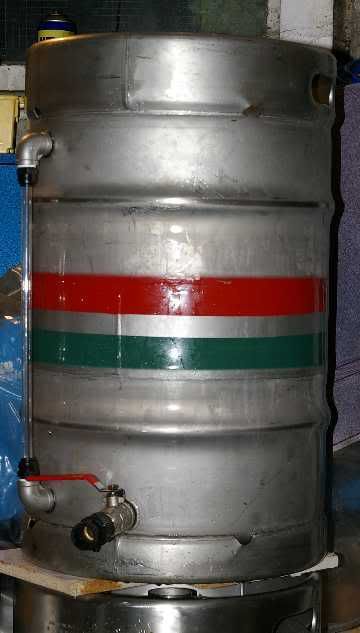
and I calibrated it (roughly) in 5-litre increments which you can just see here:
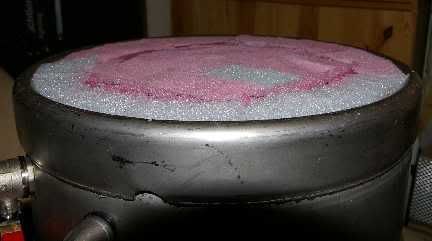
A metal barrel looks to me like a big thing for cooling things...better insulate it. There's a space at the bottom, so I filled that up with a patchwork of scraps of polythene foam packing (the stiff, greasy-feeling stuff, not "foam rubber"). These were stuck together with hot-gun glue.
One layer:
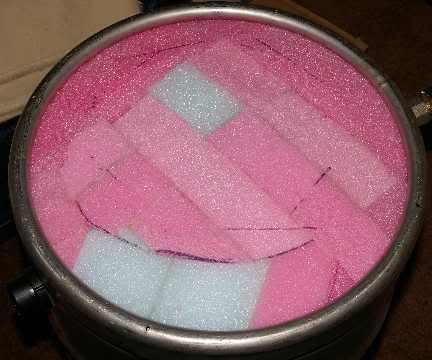
A second layer:
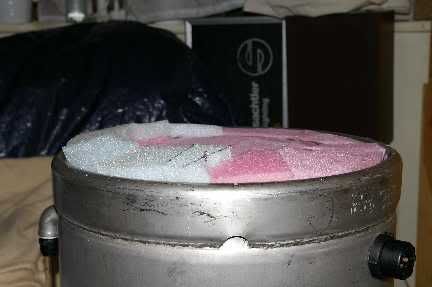
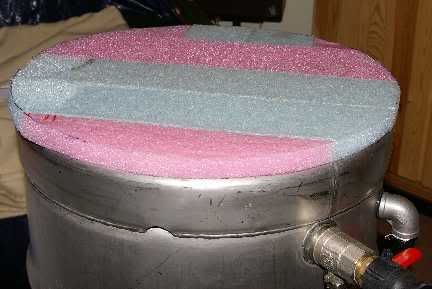
The 2nd layer had to be sawn level with the big breadknife:
before a foam base went on (to insulate the HLT from the table etc.):
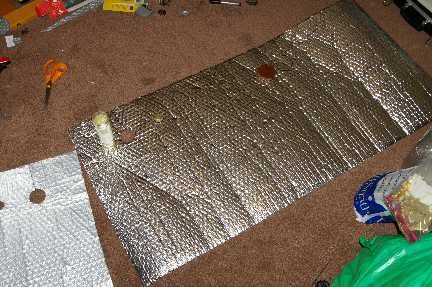
Now I started doing the sides with foil-backed bubblewrap (£12.52 for 8 metres from Wickes). If it had been the summer then I would have used camping mats from Poundland - my Electrim boilers are insulated with our old camping mats which were a bit knackered for sleeping on.
First layer of bubble-wrap:

I took it off again and used it as a template to cut the second and third layers, allowing a bit for the increased circumference. The holes for the sight tube, element and valve were marked-out using various jars and lids:
Here it is with the joins done in silver gaffer tape:
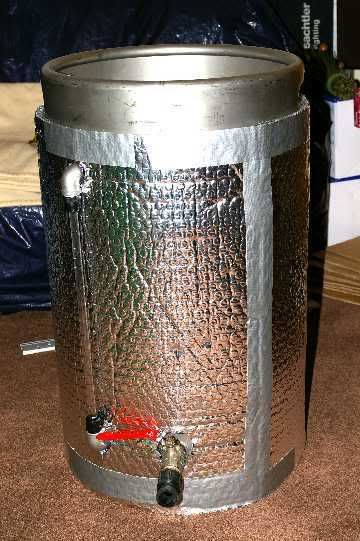
There are pictures of the completed HLT in use here. I have had to strip off the bubblewrap since then while investigating more than one slight drip or dribble: I've fixed the lower sight-tube elbow, and the 10mm-to-1/2" BSP JG fitting which goes into that, but there's the least drip from the element. I've brought it indoors this afternoon because it's freezing outside, I will freeze, and the silicone sealant will take all day to go off, as opposed to twenty minutes in the warm.
Next step: probably two elements in another cask as a bigger boiler - but I'll have to make a new immersion chiller as well.