
This all started after watching the brewing videos and reading the instruction manuals for the WilliamsWarn http://www.williamswarn.com/The-WilliamsWarn. What I particularly liked was that after pitching the yeast the beer never comes into contact with O2 until it lands into your glass to be drunk AND that the beer is carbonated and ready to keg/drink as soon as it’s finished fermenting.
I wanted a WilliamsWarn but the cost was too great, I think the price of the unit itself is OK but the shipping, duty and VAT was a killer, it would have added over £1,300 to the price!!
So in true homebrewers tradition I set about trying to replicate as many of the benefits I like of the WilliamsWarn with equipment I could source in the UK and a really good thread titled ‘Closed-system pressurized fermentation technique!’ http://www.homebrewtalk.com/showthread.php?t=44344 on another forum.
After much deliberation and experimentation this is my current setup and process so I thought I would share this with everyone. I welcome all of your comments, questions, suggestions and criticisms.
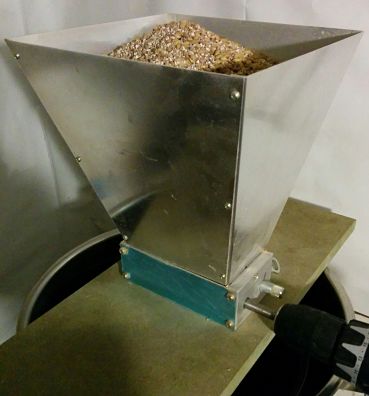
I brew with a 20L Braumeister and have done for a few years now, quite simply the best investment I ever made for my hobby. I’ve put up a brew day previously so I won’t go through that other than to show my way of avoiding dough balls.
I crush my grains directly into the Braumeister, except wheat which I crush twice, first into a bucket and then into the BM with the rest of the grains. I find that this cuts down on the dust produced and seems to eliminate dough balls.
I use 20L Sankey kegs so I brew to have 21L into the fermenter as I have about 1L dead space in my fermenter. After the boil has completed I run the wort through a counter flow chiller and a wine aerator into a 30L Sankey keg.
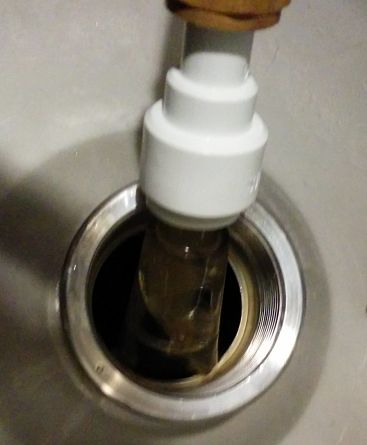
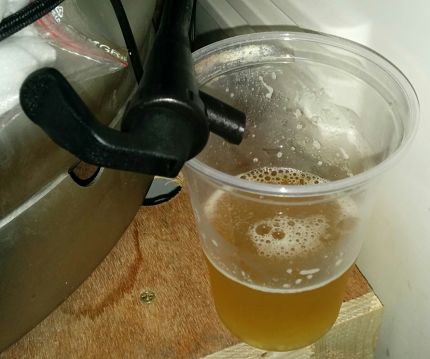
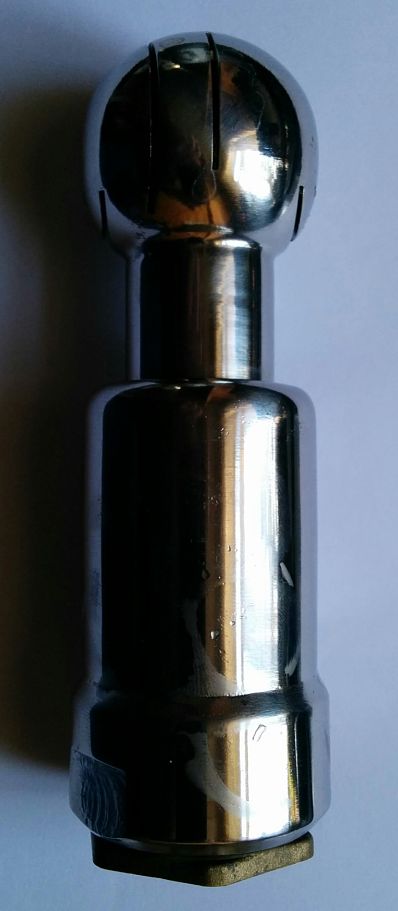
In order to prevent yeast from being transferred from the fermentation keg to the serving keg I place this over the end of the spear.
Like so

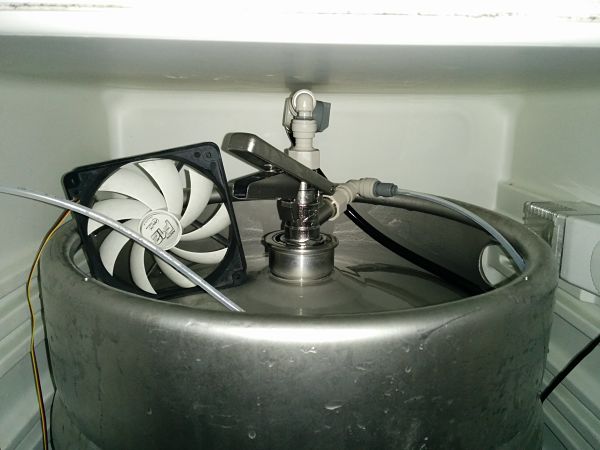
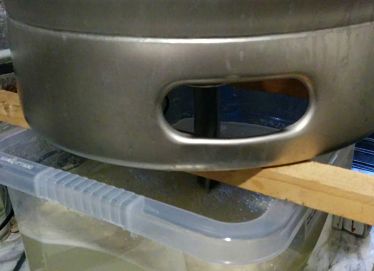
Once the 30L fermenting keg is filled the spear is inserted and the keg is transferred to my fermentation fridge. I have a small computer fan running to circulate the air which seems to help temperature stability. A keg coupler, with the one way valves removed, attached with a party tap on the beer out so that samples can be taken and the gas in is now a gas out. A line is attached to the gas out and fed through the side of the fermentation fridge.
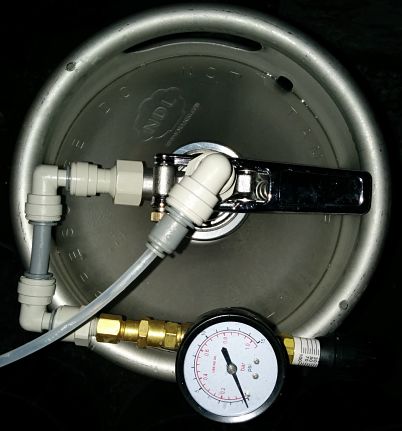
The 20L serving keg also has a coupler on it with the one way valves removed, the beer out is now a gas in and the gas in is now a gas out. The gas out line from the fermenting keg is connected to the beer side of the serving keg and a pressure relief valve is connected to the gas side of the serving keg. This allows the serving keg to be purged of O2 by the CO2 produced during fermentation.
I use a STC-1000 which has had the firmware updated to STC-1000+ https://github.com/matsstaff/stc1000p , this allows me to set fermentation schedules which is very handy as I work away a reasonable amount.
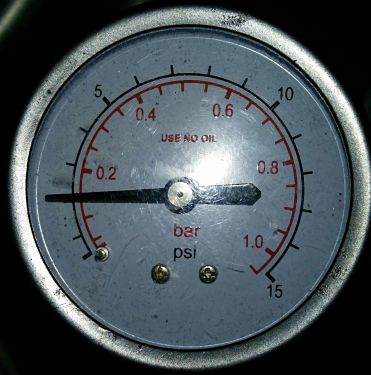
I generally set the PRV to about 2 or 3 PSI for the start of the fermentation
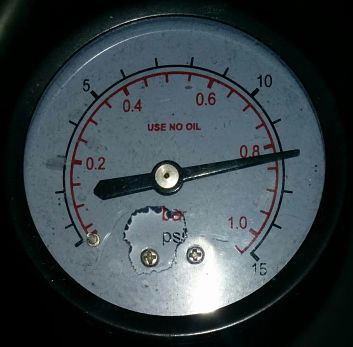
After a few days I reset the PRV to about 12 PSI
I use the party tap to take samples to check gravity etc.
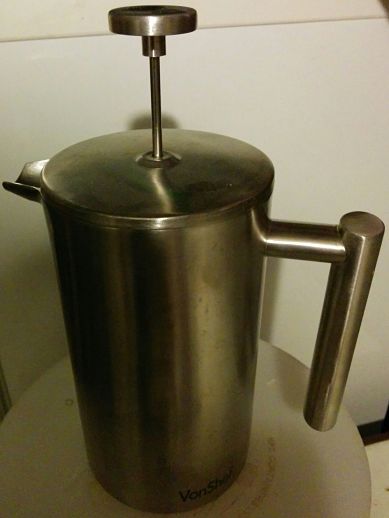
As you can imagine this method is not suited for dry hopping, to get around this I use the ‘hop tea’ method. I steep the hops, up to 50g, in a stainless steel insulated coffee press at 65C for 20 mins.
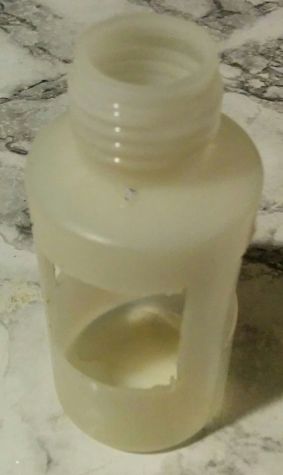
I then add this to a 10 inch water filter, the hops going into a container designed for resin refills so that I can get every last drop of hop tea and as a plus is acts as a bit of a filter.
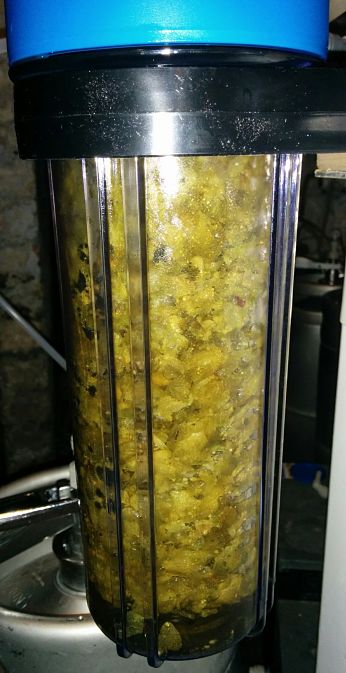
If I think the final sample is a bit hazy and I want to fine the beer I add the isinglass to the 10 inch water filter with the same insert but not necessarily the hops, depends on the recipe.
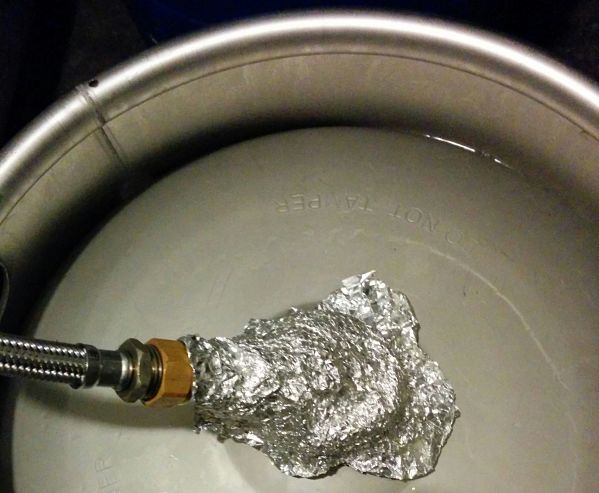
Both the fermenting keg and the serving keg are pressurised to about 8 PSI once the fermentation keg has been chilled to 3C for a couple of days I use some of this pressure to purge the water filter if I’m using it and then start a siphon going between the 2 kegs. This image shows its normal operation which is a straight forward transfer without hops or isinglass.

The water filter in this image is always in the transfer circuit, it protects the PRV from overflow and foam.
When I start to transfer I connect the fermentation keg beer connector to the serving keg beer connector, the serving keg gas connector to the water filter trap , this is teed off to a valve, a tee to allow extra CO2 to be introduced and then onto the gas connector of the fermentation keg.
I start the siphon by reducing the pressure in the serving keg with the valve and the PRV and once the beer is flowing I turn up the PRV and open the valve so the CO2 displaced by the beer in the serving keg can go into the fermentation keg to replace the beer. This works well enough for about ¾ of the beer volume and then the siphon stops, I’m not all sure why, unless it’s because there is a background pressure of 6 to 8 PSI in the circuit ???
To get the balance of the beer from the fermentation keg to the serving keg I close the valve in the gas circuit, apply CO2 at around 6 PSI and the open the PRV to approx 4 to 5 PSI which pushes the remaining beer out of the fermentation keg into the serving keg, any overflow goes into the water filter.
Once the transfer is complete the couplings are removed from both kegs. The top of the spear on the serving keg is cleaned and sprayed with starsan before I either hook it up, already carb’d, to a beer line or a cleaned and starsan’d dust cover is fitted for storage.
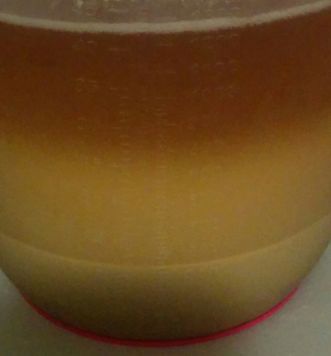
When I tip out the last of the liquid in the fermentation keg it shows that this system has a dead space of just over 1.2L

If I allow it to settle is shows that the beer loss is quite acceptable
Once I’ve emptied the dregs from the fermentation keg I then use my CIP spray ball and a garden pump to clean it out.
I used to use sodium percarbonate but found that it foams too much so I’m now using dishwasher powder.
I've been using this process for about a year now, done 19 brews so far and I've been getting very good results out of it with many different styles of beer such as saison, weissbier, bitter, APA, porter, IPA, brown ale, mild, pilsner and Belgium blond ale. Future brews will include styles such as Belgium Wit, Dry Irish Stout and an American Rye.
I hope that some of you will find this an interesting alternative process.