Sweet Georgia Brown Ale (with Pics, wow!)

Had a good one? Tell us about it here - and don't forget - we like pictures!
User avatar
orlando
So far gone I'm on the way back again!
Posts: 7197
Joined: Thu Nov 17, 2011 3:22 pm
Location: North Norfolk: Nearest breweries All Day Brewery, Salle. Panther, Reepham. Yetman's, Holt

Sweet Georgia Brown Ale (with Pics, wow!)

Post by orlando » Thu Mar 14, 2013 1:03 pm

First time I've brewed with a Brewlabs slant so though it might interest some.

Recipe

Brew length 28 litres (explain the odd length later)


4.500 kg Maris Otter (Crisp) (7.9 EBC) 76.9 %
0.500 kg Caravienna Malt (50.0 EBC) 8.5 %
0.250 kg Brown Porter Malt (1700s style) (85.0 EBC) 4.3 %
0.220 kg Chocolate Malt (800.0 EBC) 3.8 %
0.160 kg Torrified Wheat (3.0 EBC) 2.7 %
0.140 kg Barley, Flaked (3.3 EBC) 2.4 %
0.083 kg Black Malt (1280.0 EBC) 1.4 %
25.00 g Goldings, East Kent [7.20 %] - Boil 90.0 min 16.3 IBUs
0.50 tsp Protafloc (Boil 15.0 mins)
30.00 g Goldings, East Kent [7.20 %] - Boil 15.0 min 9.1 IBUs
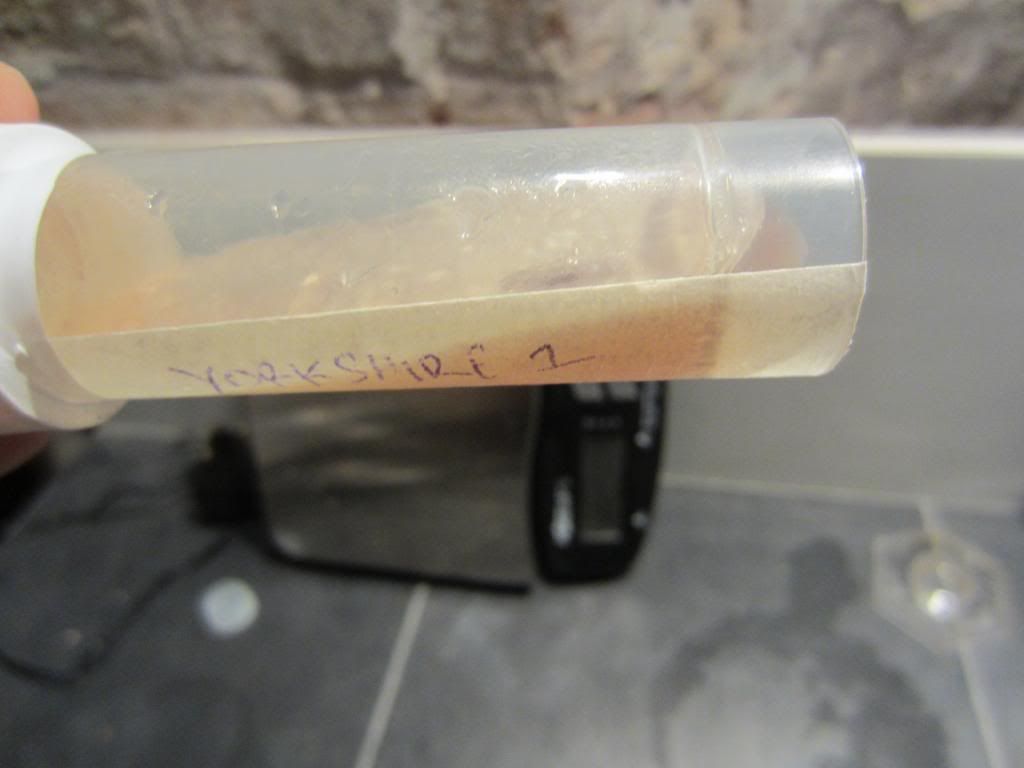
1.1 pkg Brew Lab 3524 Yorkshire 1 (Brew Lab #)
25.00 g Goldings Pellets [5.90 %] - Dry Hop 2.0 Days 0.0 IBUs

Beer Profile

Est Original Gravity: 1.048 SG Measured Original Gravity: 1.046 SG
Est Final Gravity: 1.014 SG
Estimated Alcohol by Vol: 4.5 %
Bitterness: 25.4 IBUs Calories: 470.9 kcal/l
Est Color: 42.9 EBC

Transferred the yeast to my 100ml flask using DME I sterilised in the pressure cooker. This boiled over in there so was definitely sterilised but it made a mess of the flasks. Left it on the stir plate for 36 hours but didn't run the plate, stepped it up to 500ml this time using the plate for 24 hours, then stepped up again by pouring this into the 2 litre flask with a little under 1 litre in it. Took it off the plate and cooled it down then poured off the excess wort and put into another litre of DME wort, back on the stir plate until pitched.

Image

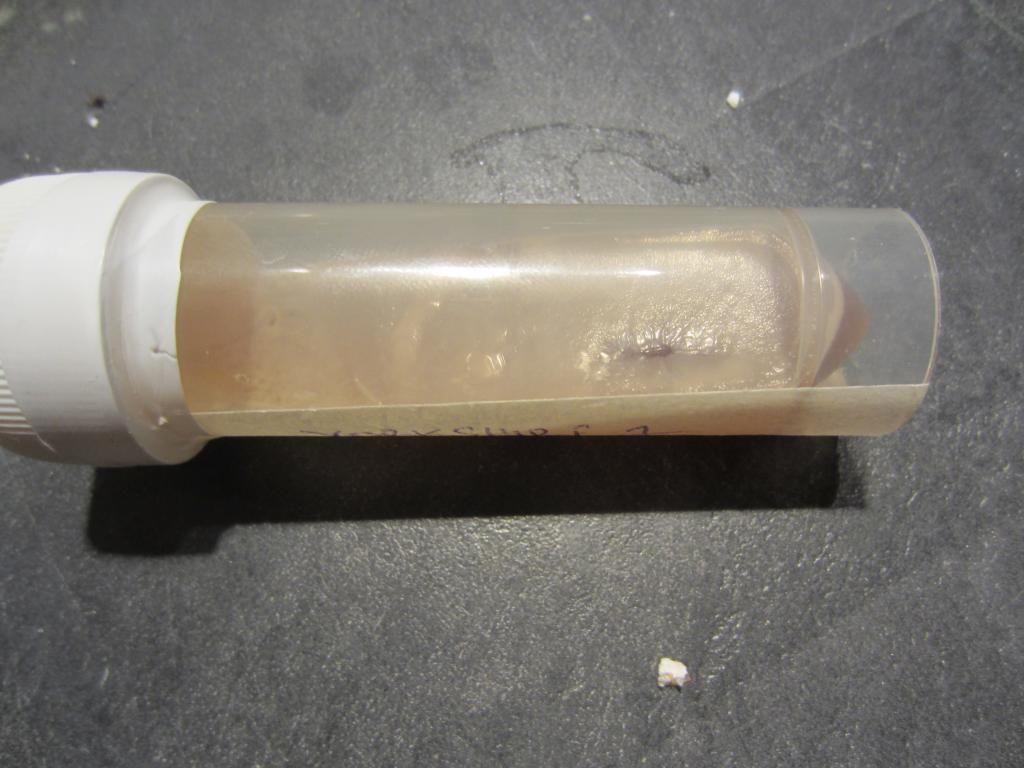
This isn't the original one but is an example of culturing yeast from an original slant to make yet another, perpetual yeast :D Not a good shot but there is a lovely "carpet" of new yeast cells.

Image

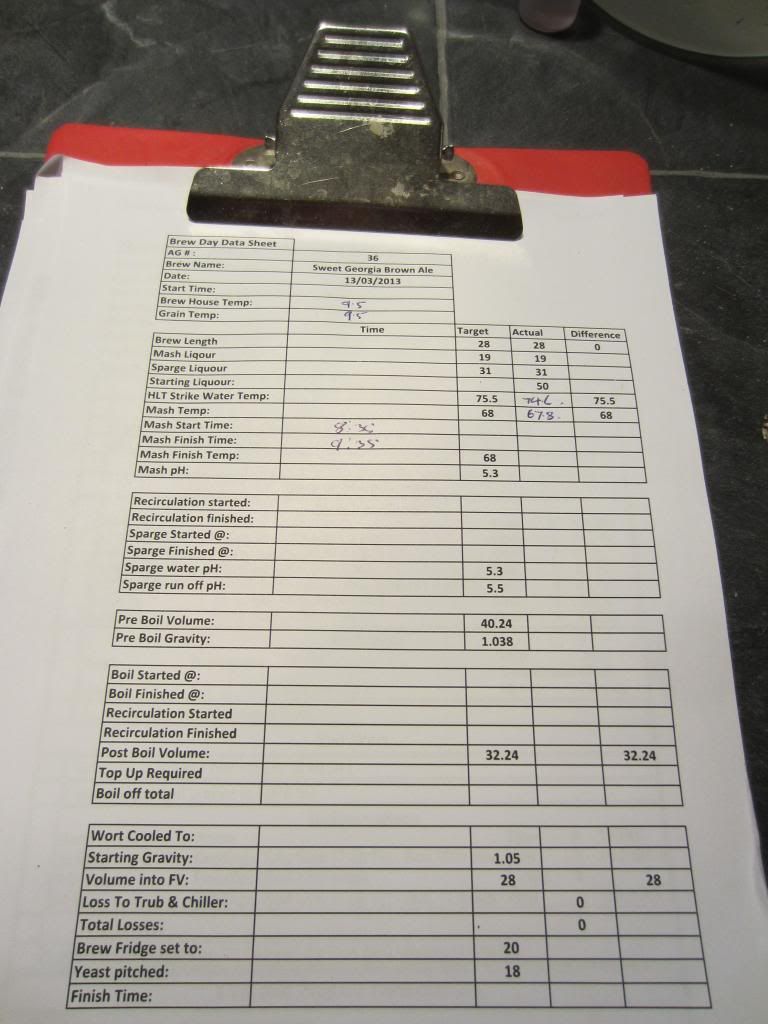
Data capture on the brew day sheet.

Image

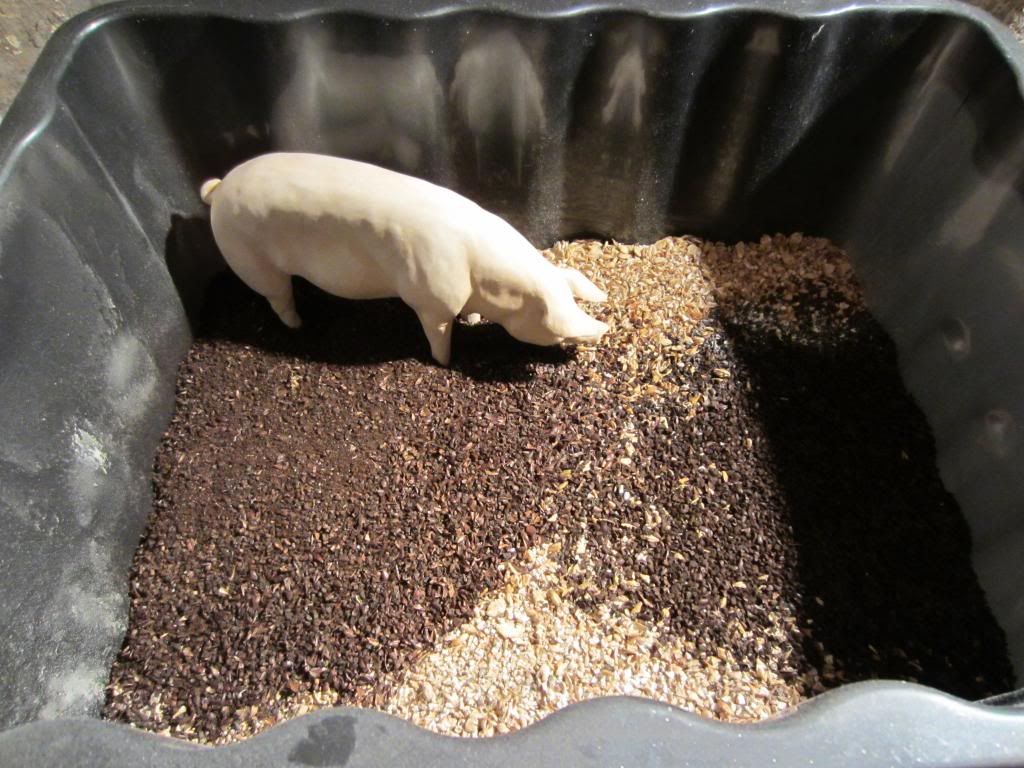
Lot of adjuncts in this grist, spot the banker! :shock:

Image

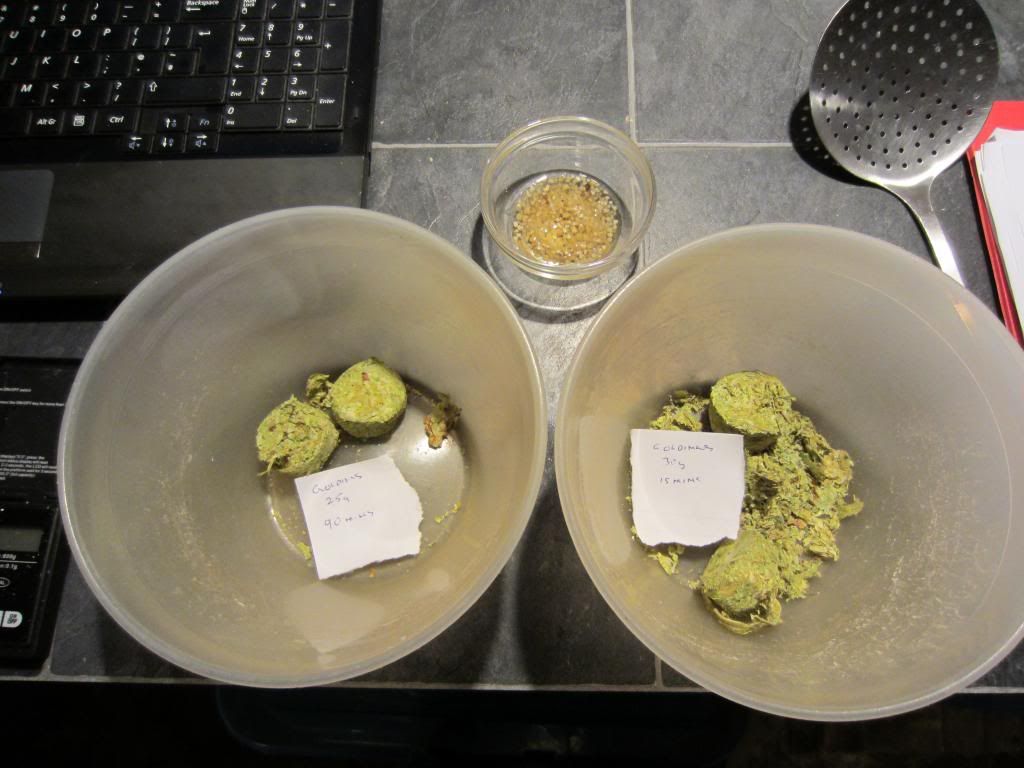
Sadly I here these types of hop plugs are being discontinued.

Image

Shot of my hop sock, which I always have in place when using wheat as it really gives a quick run off (10 minutes today)

Image

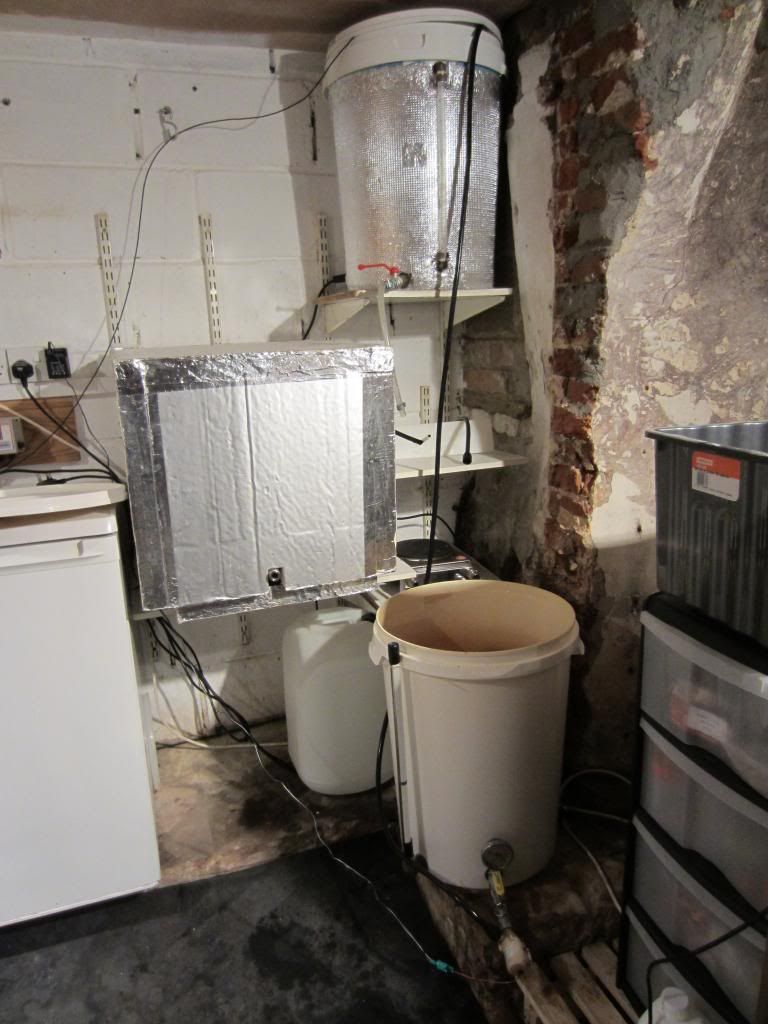
Acidified and treated water being pumped to HLT. Mash tun under the thermal cover, lost only 1/2 a degree.

Image

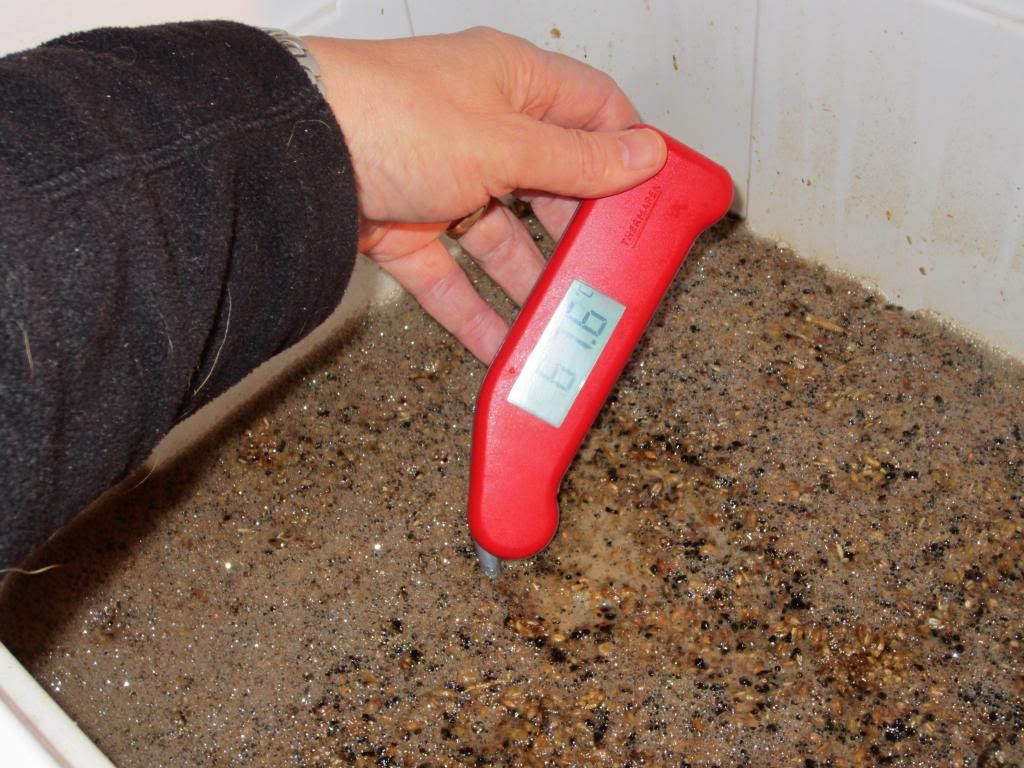
New Thermapen (not as fast as I was lead to believe but still very good value) showing I missed my mash temp by .4, bit colder in the brewhouse than I anticipated.

Image

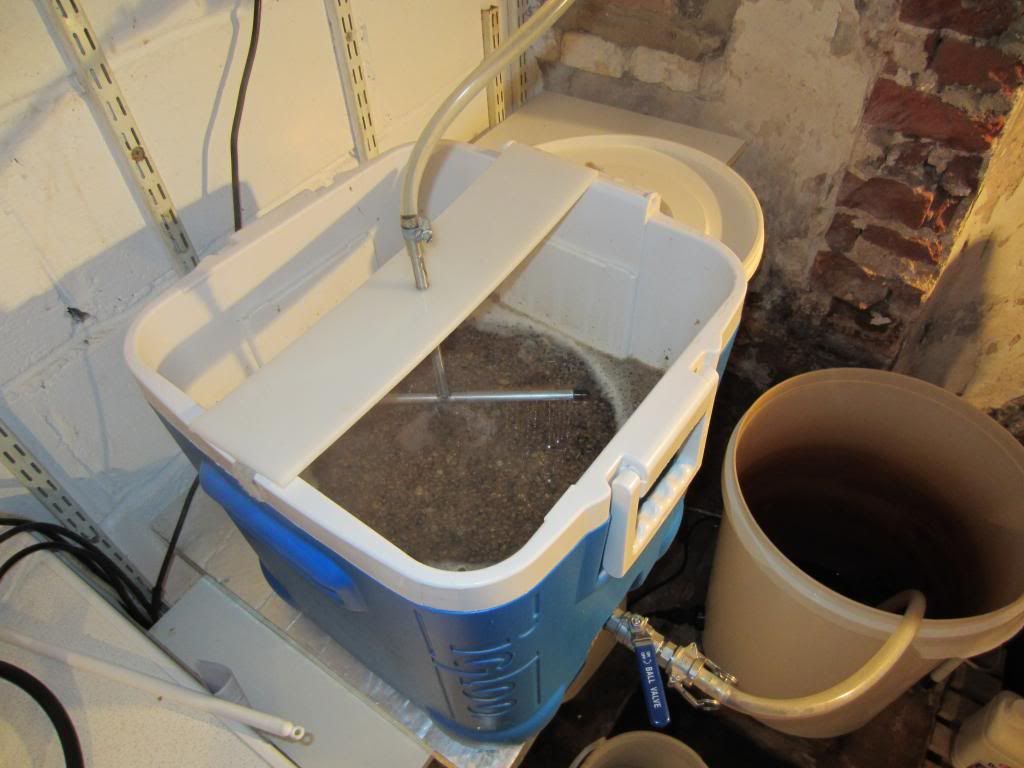
Being a darker beer din't recirc but the run off was really clear from the start.

Image

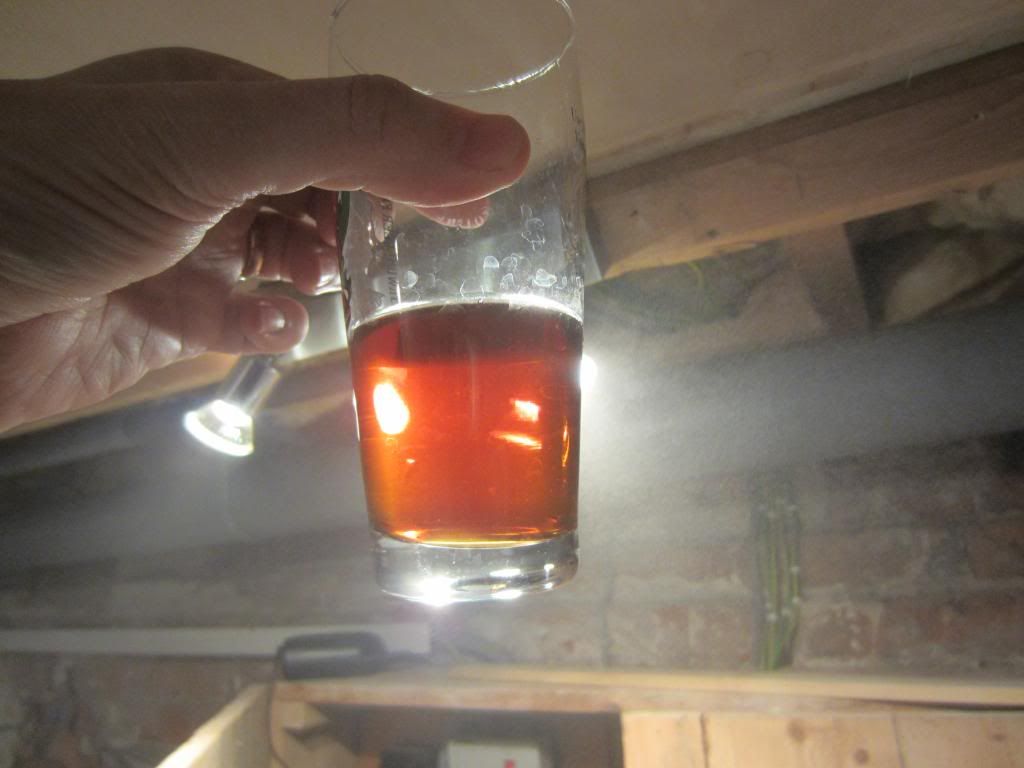
Colour doesn't do it justice, promise.

Image

pH was actually targeted to be 5.3 but I had to change the recipe at the last moment so I think it drove it a little lower as a result. (Brun water calculator derived).

Image

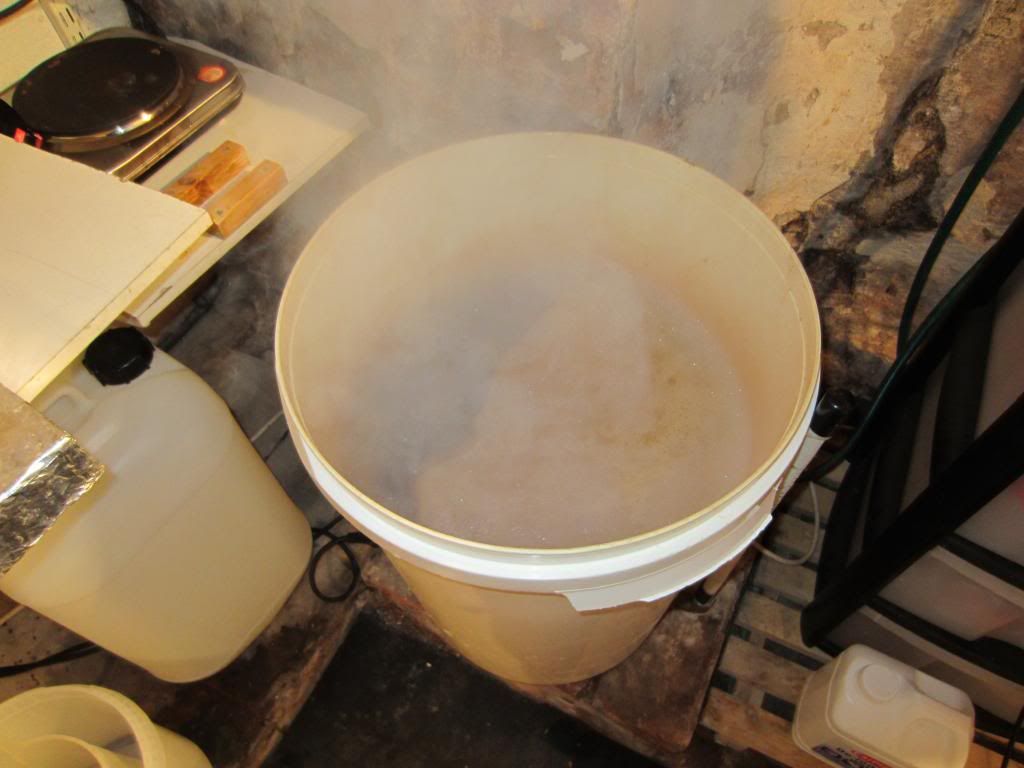
Double element boil on a cold day for 90 minutes = horrendous losses close to 10 litres!

Image

26 litres from 90c to 18c in 10 minutes, gotta love plate chillers.

Image

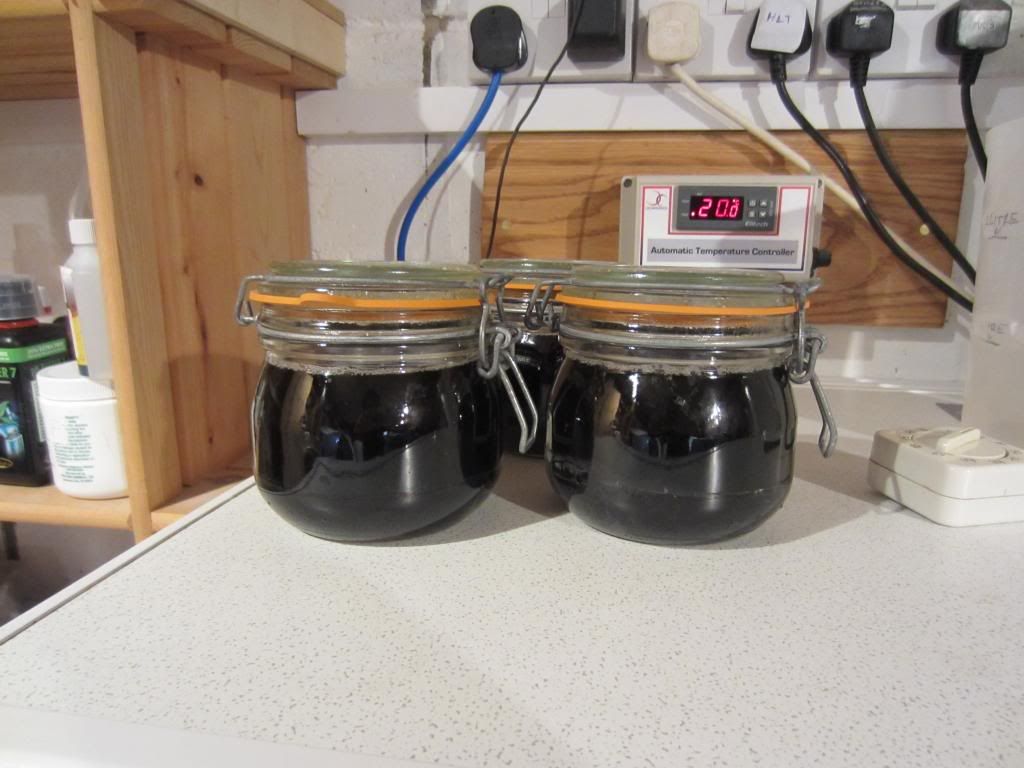
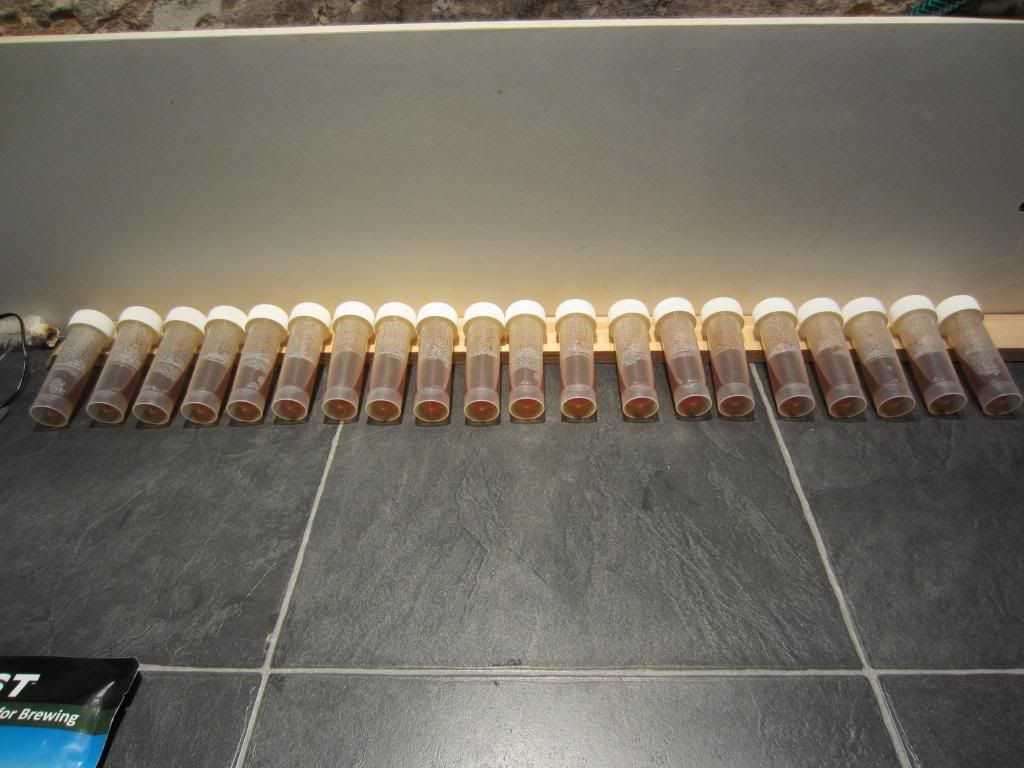
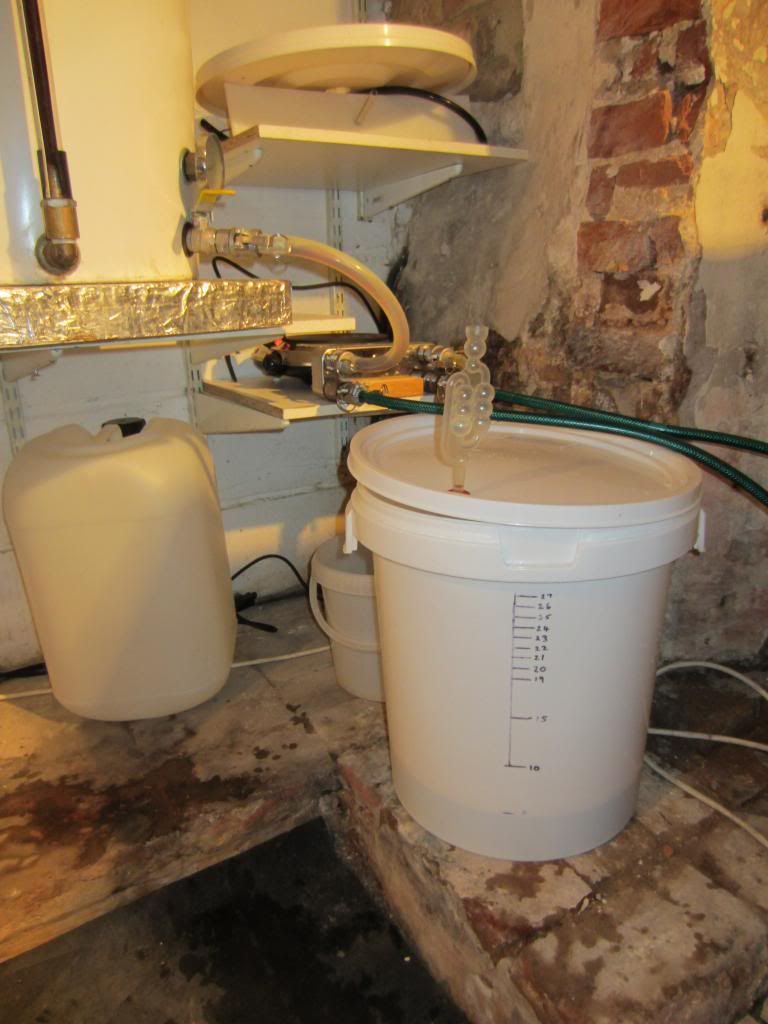
The reason for the longer length. I occasionally collect a bit of extra wort for stepping up yeast. These go into the pressure cooker so I can use them straight away (once at room temp) for stepping up yeast.

Image

Got this final gravity hydrometer when on a vist to Murphy & Son, really happy with the easier reading of it.

Image

Just a little too vigorous with aeration (drill with a paddle).

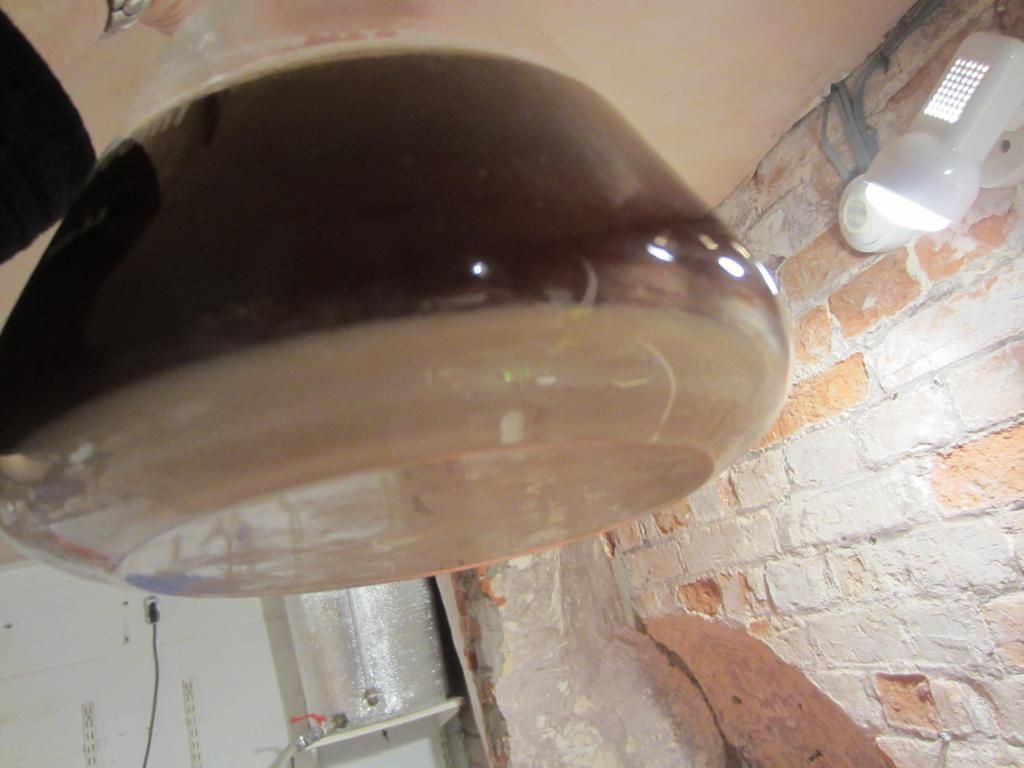
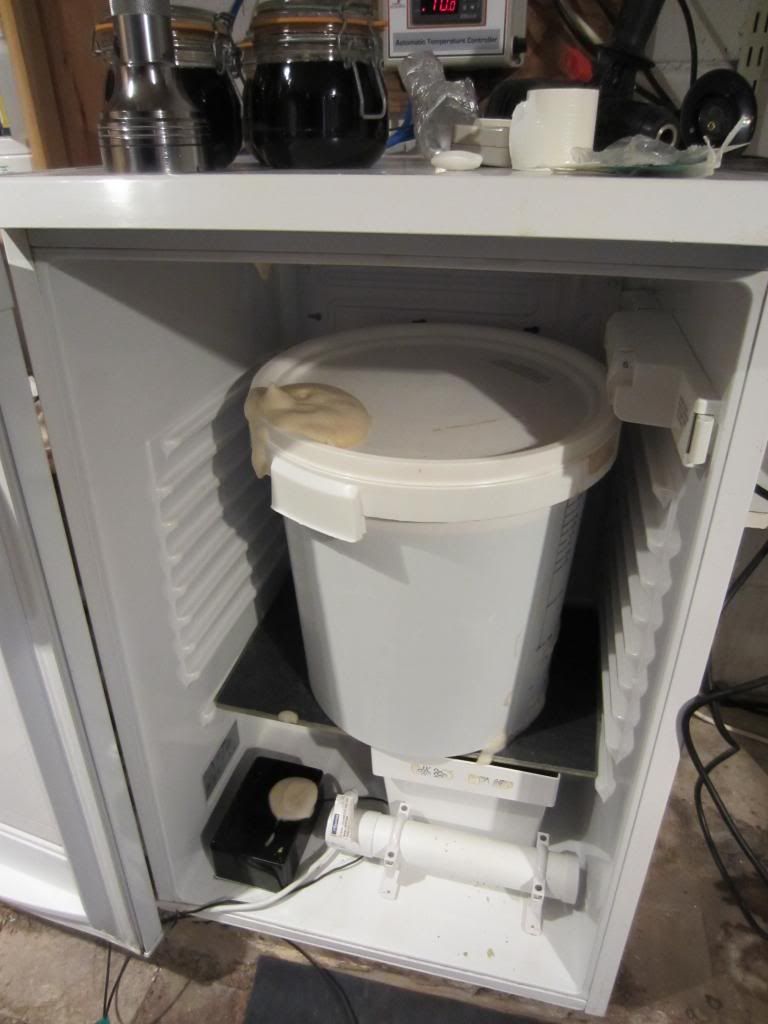
So that's it all tucked up at 20c and already kicking off a big rocky head, so the yeast is living up to the potential, for now.
I am "The Little Red Brooster"

Fermenting:
Conditioning:
Drinking: Southwold Again,

Up Next: John Barleycorn (Barley Wine)
Planning: Winter drinking Beer

Morten

Re: Sweet Georgia Brown Ale (with Pics, wow!)

Post by Morten » Thu Mar 14, 2013 1:51 pm

Nice

I haven't brewed a brown ale in ages....might just change that in the near future :D

rimski

Re: Sweet Georgia Brown Ale (with Pics, wow!)

Post by rimski » Sat Mar 23, 2013 3:30 pm

Hi Orlando
Looks like a really well organised set up you've got there.
I've never used slants and just wondered how exactly they work and how you store them

Cheers Neil

jaroporter
Drunk as a Skunk
Posts: 996
Joined: Sat Jul 21, 2012 11:12 pm
Location: Garden of England

Re: Sweet Georgia Brown Ale (with Pics, wow!)

Post by jaroporter » Sat Mar 23, 2013 3:45 pm

hey,
what volume of water do you get through in those 10 minutes it takes to cool? to do it that fast with the IC i'd need to put some real thought into how i was gonna use/reuse the 100L+ of water i was putting through it.
dazzled, doused in gin..

User avatar
orlando
So far gone I'm on the way back again!
Posts: 7197
Joined: Thu Nov 17, 2011 3:22 pm
Location: North Norfolk: Nearest breweries All Day Brewery, Salle. Panther, Reepham. Yetman's, Holt

Re: Sweet Georgia Brown Ale (with Pics, wow!)

Post by orlando » Sat Mar 23, 2013 4:17 pm

One of the beauties of a plate chiller is how incredibly efficient they are. Of course at this time of year the ground water temp is really low so of course that helps too. as to how much water I don't know. It could be 100 litres + for all I know, what happens to it is that it is piped up to our pond and is used to keep that topped up.
I am "The Little Red Brooster"

Fermenting:
Conditioning:
Drinking: Southwold Again,

Up Next: John Barleycorn (Barley Wine)
Planning: Winter drinking Beer

User avatar
orlando
So far gone I'm on the way back again!
Posts: 7197
Joined: Thu Nov 17, 2011 3:22 pm
Location: North Norfolk: Nearest breweries All Day Brewery, Salle. Panther, Reepham. Yetman's, Holt

Re: Sweet Georgia Brown Ale (with Pics, wow!)

Post by orlando » Sat Mar 23, 2013 5:26 pm

rimski wrote:Hi Orlando
Looks like a really well organised set up you've got there.
I've never used slants and just wondered how exactly they work and how you store them

Cheers Neil
Sorry Neil, missed this question for some reason. I use plastic autoclavable vials which have a mixture of agar and wort in them. They are then pressure cooked to get them sterile. They are then stored on a "slant" until they have cooled I then tape them with some PTFE and put them in the fridge until ready for use. The next step is to then transfer yeast cells from the donor yeast to the slants. I have a tiny wire loop that I heat up to sterilise then dip into a liquid yeast or "scrape up some yeast cells from a petri dish that has grown them then they are smeared over the surface of the slant and left to grow at room temp for about a week. Once a thin Carpet like layer of yeast cells have grown I tighten the cap and tape up with PTFE again. I put a little masking tape on the vial and market with the date inoculated along with what yeast type it was. This is then once again stored in the fridge until needed.

When you decide to brew next, about a week in advance, sometimes a little less, I add a little wort to a vial that is at room temperature, wort has to be the same temp too, then shake the vial to mix the yeast cells with the wort then pour the lot into a wort starter of about 100ml and let it grow for 24-48 hours. I then step this up to 500 ml onto a stir plate and then step again to a litre or 1.5 litre and again put it back on the stir plate, finally I either put it into the fridge and decant the wort from the yeast or, if the wort I'm using isn't too different from the one I'm brewing, I will pitch the lot into the brew.

There are loads of tutorials on the web, which as usual have slightly different approaches, but all have in common a desire to have a bank of different yeasts to hand that need never be bought again. Particularly handy if you know someone who is brewing with a yeast you would like to try and you have access to some, just take a long a blank slant and your metal loop, flame and dig in.

Here are some I made earlier.


Image
I am "The Little Red Brooster"

Fermenting:
Conditioning:
Drinking: Southwold Again,

Up Next: John Barleycorn (Barley Wine)
Planning: Winter drinking Beer

Down2Die

Re: Sweet Georgia Brown Ale (with Pics, wow!)

Post by Down2Die » Sun Mar 24, 2013 1:21 am

orlando wrote:
rimski wrote:Hi Orlando
Looks like a really well organised set up you've got there.
I've never used slants and just wondered how exactly they work and how you store them

Cheers Neil
Sorry Neil, missed this question for some reason. I use plastic autoclavable vials which have a mixture of agar and wort in them. They are then pressure cooked to get them sterile. They are then stored on a "slant" until they have cooled I then tape them with some PTFE and put them in the fridge until ready for use. The next step is to then transfer yeast cells from the donor yeast to the slants. I have a tiny wire loop that I heat up to sterilise then dip into a liquid yeast or "scrape up some yeast cells from a petri dish that has grown them then they are smeared over the surface of the slant and left to grow at room temp for about a week. Once a thin Carpet like layer of yeast cells have grown I tighten the cap and tape up with PTFE again. I put a little masking tape on the vial and market with the date inoculated along with what yeast type it was. This is then once again stored in the fridge until needed.

When you decide to brew next, about a week in advance, sometimes a little less, I add a little wort to a vial that is at room temperature, wort has to be the same temp too, then shake the vial to mix the yeast cells with the wort then pour the lot into a wort starter of about 100ml and let it grow for 24-48 hours. I then step this up to 500 ml onto a stir plate and then step again to a litre or 1.5 litre and again put it back on the stir plate, finally I either put it into the fridge and decant the wort from the yeast or, if the wort I'm using isn't too different from the one I'm brewing, I will pitch the lot into the brew.

There are loads of tutorials on the web, which as usual have slightly different approaches, but all have in common a desire to have a bank of different yeasts to hand that need never be bought again. Particularly handy if you know someone who is brewing with a yeast you would like to try and you have access to some, just take a long a blank slant and your metal loop, flame and dig in.

Here are some I made earlier.


Image
great system you have there. setting up myself at present will definately copy your process thanks

User avatar
orlando
So far gone I'm on the way back again!
Posts: 7197
Joined: Thu Nov 17, 2011 3:22 pm
Location: North Norfolk: Nearest breweries All Day Brewery, Salle. Panther, Reepham. Yetman's, Holt

Re: Sweet Georgia Brown Ale (with Pics, wow!)

Post by orlando » Sun Mar 24, 2013 8:26 am

I quickly read again what I had written and noticed an omission in the process, after heating up the metal loop you should cool it in starsan or on an area of agar before touching the yeast or of course you will fry them.
I am "The Little Red Brooster"

Fermenting:
Conditioning:
Drinking: Southwold Again,

Up Next: John Barleycorn (Barley Wine)
Planning: Winter drinking Beer

rimski

Re: Sweet Georgia Brown Ale (with Pics, wow!)

Post by rimski » Sun Mar 24, 2013 7:14 pm

Cheers

I really must invest in the yeast book as so far I usually just use dry yeast with some cracking results but feel the next step is better liquid yeast usage

User avatar
orlando
So far gone I'm on the way back again!
Posts: 7197
Joined: Thu Nov 17, 2011 3:22 pm
Location: North Norfolk: Nearest breweries All Day Brewery, Salle. Panther, Reepham. Yetman's, Holt

Re: Sweet Georgia Brown Ale (with Pics, wow!)

Post by orlando » Mon Mar 25, 2013 7:51 am

rimski wrote:Cheers

I really must invest in the yeast book as so far I usually just use dry yeast with some cracking results but feel the next step is better liquid yeast usage
Do you rehydrate the yeast first? If you don't it is something you will learn a lot about in "Yeast".
I am "The Little Red Brooster"

Fermenting:
Conditioning:
Drinking: Southwold Again,

Up Next: John Barleycorn (Barley Wine)
Planning: Winter drinking Beer

rimski

Re: Sweet Georgia Brown Ale (with Pics, wow!)

Post by rimski » Mon Mar 25, 2013 9:37 pm

How long and how do you store them for?
orlando wrote:
rimski wrote:Cheers

I really must invest in the yeast book as so far I usually just use dry yeast with some cracking results but feel the next step is better liquid yeast usage
Do you rehydrate the yeast first? If you don't it is something you will learn a lot about in "Yeast".
Nope. I am a sprinkle straight on kinda guy. Basically most people I have spoke to or read of say that the difference between that and rehydrating is time and the introduction of the possibility of contamination when rehydrating

User avatar
orlando
So far gone I'm on the way back again!
Posts: 7197
Joined: Thu Nov 17, 2011 3:22 pm
Location: North Norfolk: Nearest breweries All Day Brewery, Salle. Panther, Reepham. Yetman's, Holt

Re: Sweet Georgia Brown Ale (with Pics, wow!)

Post by orlando » Tue Mar 26, 2013 8:05 am

rimski wrote:How long and how do you store them for?
orlando wrote:
rimski wrote:Cheers

I really must invest in the yeast book as so far I usually just use dry yeast with some cracking results but feel the next step is better liquid yeast usage
Do you rehydrate the yeast first? If you don't it is something you will learn a lot about in "Yeast".
Nope. I am a sprinkle straight on kinda guy. Basically most people I have spoke to or read of say that the difference between that and rehydrating is time and the introduction of the possibility of contamination when rehydrating
Then I would buy the book as quick as you can :)
I am "The Little Red Brooster"

Fermenting:
Conditioning:
Drinking: Southwold Again,

Up Next: John Barleycorn (Barley Wine)
Planning: Winter drinking Beer

User avatar
orlando
So far gone I'm on the way back again!
Posts: 7197
Joined: Thu Nov 17, 2011 3:22 pm
Location: North Norfolk: Nearest breweries All Day Brewery, Salle. Panther, Reepham. Yetman's, Holt

Re: Sweet Georgia Brown Ale (with Pics, wow!)

Post by orlando » Wed Mar 27, 2013 1:35 pm

Thought I would update this by showing the start and end point of brewing from slants.

This brew started with the yeast on the slant shown here.

Image


This is stepped in 100ml w/out stir plate, followed by 500ml on the stir plate then 1l on the stir plate and you end up with this.

Image
I am "The Little Red Brooster"

Fermenting:
Conditioning:
Drinking: Southwold Again,

Up Next: John Barleycorn (Barley Wine)
Planning: Winter drinking Beer

super_simian
Piss Artist
Posts: 281
Joined: Thu Sep 22, 2011 10:11 am

Re: Sweet Georgia Brown Ale (with Pics, wow!)

Post by super_simian » Wed Mar 27, 2013 1:44 pm

'Aint nobody got time for dat!

User avatar
orlando
So far gone I'm on the way back again!
Posts: 7197
Joined: Thu Nov 17, 2011 3:22 pm
Location: North Norfolk: Nearest breweries All Day Brewery, Salle. Panther, Reepham. Yetman's, Holt

Re: Sweet Georgia Brown Ale (with Pics, wow!)

Post by orlando » Wed Mar 27, 2013 1:50 pm

super_simian wrote:'Aint nobody got time for dat!
It is a little time consuming, but like the brewday a lot of it is down to waiting whilst other things are doing their stuff. I take that time for doing things like this and reaping all the rewards mentioned earlier in the thread.
I am "The Little Red Brooster"

Fermenting:
Conditioning:
Drinking: Southwold Again,

Up Next: John Barleycorn (Barley Wine)
Planning: Winter drinking Beer

Post Reply