Brewery Programming

The forum for discussing all kinds of brewing paraphernalia.
Matho

Re: Brewery Programming

Post by Matho » Sun Apr 29, 2012 4:40 am

Fil I have just upgraded to v1.0, I think your on the right track taking the suggestions off the release notes where the .cpp file calls for #include wprogram.h replace it with

#if defined(ARDUINO) && ARDUINO >= 100
#include "Arduino.h"
#else
#include "WProgram.h"
#endif

and it looks like the wire library has been changed from recieve() and send() to read() and write(), I would change them in the .cpp file and see what happens. at the moment I'm on linux and the text editor comes up with the correct formatting I think if you try and open them in notepad it comes up jumbled, there is another text editor out there call crimson editor which can recognise code and format it correctly. Ill shutdown linux and reboot on xp to see.

just a note I'm not very experienced with this stuff so I could be completely wrong :)
cheers steve

Matho

Re: Brewery Programming

Post by Matho » Sun Apr 29, 2012 4:52 am

yep crimson editor recognises C++ formatting so it comes up readable

http://www.crimsoneditor.com/english/download.html

just do the changes in that and save the .cpp file and see what happens if it doesn't work you can always copy the .cpp file from the original download

Fil
Telling imaginary friend stories
Posts: 5229
Joined: Sun Oct 16, 2011 1:49 pm
Location: Cowley, Oxford

Re: Brewery Programming

Post by Fil » Sun Apr 29, 2012 4:16 pm

Cheers for the pointer to the editor, a small footprint context sensitive editor is always useful

And thanks for confirming my suspicions on the root of the problem, it just seemed odd that an error had stood for so long without comment on some list or another?? i did find a lcd keypad i2c guide on arduino playground and right a the end it made a small referrence to not liking the way the company BV do business?? did that kill thier arduino trade??


I found the way to use the sketch editor.
Copy the .h and .ccp files to the example sketch folder, close and reopen the sketch editor and when you reopen your example sketch the .h and .ccp files will be available in separate tabs..

Make the changes.. to test save the files, and move the .ccp and .h files back to the lib folder, leaving copies behind in the example sketch folder will give duplicate reference errors when compiling the example..

it seems that the arduino compiler does all the house keeping, i wasted time tracking down object code to delete..

Ive verified my example test sketch for the i2c interface , when i get back later i will try the h/ware out and will find out if my soldering is upto the job..
ist update for months n months..
Fermnting: not a lot..
Conditioning: nowt
Maturing: Challenger smash, and a kit lager
Drinking: dry one minikeg left in the store
Coming Soon Lots planned for the near future nowt for the immediate :(

Fil
Telling imaginary friend stories
Posts: 5229
Joined: Sun Oct 16, 2011 1:49 pm
Location: Cowley, Oxford

Re: Brewery Programming

Post by Fil » Thu May 03, 2012 1:11 pm

Finally after a few resoldering attempts i have the I2C interface up code library debugged and after way too long pulling what little hair i have left out a dirty function to return a float from keypad and a cleaner function to retrieve an int and a nice simple char function. phew!!!!! took me way too long to sus out the return codes from the keypad, and that the wiring documentation or keypad control paramaters in the example were wrong!! row1 was in fact col1 it didnt help that the native returns were unprinatble characters either.. .

got to the point where i almost tested if the lcd would bounce off the floor :) am much more chilled now its workin.

cheers again for the backup matho,

got lots of coding to do and system planning this hardware choice means hacking jabbas system to bits to use a keypad,, so i might have to have a go at a Fil-troller after all. or back pedal a bit :) perhaps a keypad is not the way to go..then again ive started.....
ist update for months n months..
Fermnting: not a lot..
Conditioning: nowt
Maturing: Challenger smash, and a kit lager
Drinking: dry one minikeg left in the store
Coming Soon Lots planned for the near future nowt for the immediate :(

JabbA

Re: Brewery Programming

Post by JabbA » Thu May 03, 2012 1:28 pm

Good luck Fil, you'll get there in the end :-)

TBH, I'm not sure what advantage having a keypad will be? I can't imagine changing the preset brewery variables much at all and navigation is easy enough with the 3 button setup. I suppose if the system grows into a more automated set-up then it would be handy to call up a part of the system with a single button press.

Cheers,
Jamie

Fil
Telling imaginary friend stories
Posts: 5229
Joined: Sun Oct 16, 2011 1:49 pm
Location: Cowley, Oxford

Re: Brewery Programming

Post by Fil » Thu May 03, 2012 2:14 pm

JabbA wrote:Good luck Fil, you'll get there in the end :-)

TBH, I'm not sure what advantage having a keypad will be? I can't imagine changing the preset brewery variables much at all and navigation is easy enough with the 3 button setup. I suppose if the system grows into a more automated set-up then it would be handy to call up a part of the system with a single button press.

Cheers,
Jamie

the initial desire for a keypad was born of frustration cycling thru the 30 odd parameters of my current off the shelf pid controller, (itself a late night ,post sampling beer purchase..) just to change one setting. that and seeing an 'ardurino compatable' keypad on ebay for a couple of quid after sampling some pints of EKGbitter... Im a chap with obvious flaws...

after focusing tightly on the problem of getting the new toy working, ive now stepped back and am questioning the benefit against the work involved of actually using it.. perhaps for my next project whatever that is.. your system works well even with buttons just on the breadboard..

More i think about it i think i will back peddle a bit, hows the box and board building coming on?
ist update for months n months..
Fermnting: not a lot..
Conditioning: nowt
Maturing: Challenger smash, and a kit lager
Drinking: dry one minikeg left in the store
Coming Soon Lots planned for the near future nowt for the immediate :(

JabbA

Re: Brewery Programming

Post by JabbA » Thu May 03, 2012 2:31 pm

Ahh, I see, that makes sense!

The box seems to work well, I wasn't sure if the SSRs would get too hot in there but on the one use it's had it seems to be OK, I will keep an eye on it tho.

I've not had another go at building a board, I can't really be arsed at the noment THB, it's working as it is! I spent the bast part of last Saturday laying out components, checking and double checking my routing, soldering, trying to figure out what I've done wrong and it still didn't work- I don't want to waste all that time again! I did tell the better half that the £8 I spent last night on copper fittings for a HERMS manifold was the last I'll spend on the brewery (for a while at least ;-) ) and she'll not be impressed with only a couple of quid on some more components! And there's no hiding stuff from her, she's got a sixth sense about anything coming into the house that she was not aware I brought, I swear!

Cheers,
Jamie

Fil
Telling imaginary friend stories
Posts: 5229
Joined: Sun Oct 16, 2011 1:49 pm
Location: Cowley, Oxford

Re: Brewery Programming

Post by Fil » Thu May 03, 2012 3:44 pm

its the postman, im sure ours leaves a stone/mars bar wrapper in the street or something to signal a delivery has been made.. that or the dumped packaging ive left near the waste bin by the front door with chinese stamps on it:)

have you considered dropping necessary goodies in the other halfs ebay basket by accident?? i have on occasion shhhh!
ist update for months n months..
Fermnting: not a lot..
Conditioning: nowt
Maturing: Challenger smash, and a kit lager
Drinking: dry one minikeg left in the store
Coming Soon Lots planned for the near future nowt for the immediate :(

Matho

Re: Brewery Programming

Post by Matho » Sun May 20, 2012 9:00 am

So i received the PCB's that I ordered the other day

Image

I have been busy making up a controller so that I can put together a assembly manual here are some pictures of it

Image

Image

Image

If you could get a few people together to make the controllers you could put one together for under $150 AUD, it has been designed to mimic a braumeister controller with a few more steps and hop addition alarms

here is the eagle files that I used to make the PCB

http://www.mediafire.com/?49ksmja2v9bm8b0

and here is the latest code for it

https://github.com/mathoaus/braumiser-c ... duino2.ino

cheers steve

Matho

Re: Brewery Programming

Post by Matho » Mon May 21, 2012 7:55 am

here are some more photos of it powered up

Image

Image

cheers steve

Fil
Telling imaginary friend stories
Posts: 5229
Joined: Sun Oct 16, 2011 1:49 pm
Location: Cowley, Oxford

Re: Brewery Programming

Post by Fil » Tue May 22, 2012 2:16 am

Fantastic stuff.. a real pro finish too

I was gonna pull you up for not having a heatsink for the ssr but there it is sticking out the back in the first photo. :)

my own project has been stalled.. design issues..
ist update for months n months..
Fermnting: not a lot..
Conditioning: nowt
Maturing: Challenger smash, and a kit lager
Drinking: dry one minikeg left in the store
Coming Soon Lots planned for the near future nowt for the immediate :(

User avatar
barneey
Telling imaginary friend stories
Posts: 5423
Joined: Mon Jul 25, 2011 10:42 pm
Location: East Kent

Re: Brewery Programming

Post by barneey » Tue May 22, 2012 9:00 am

Matho wrote:here are some more photos of it powered up


cheers steve

Cracking build Steve, might be interested in the future :)
Hair of the dog, bacon, butty.
Hops, cider pips & hello.

Name the Movie + song :)

Matho

Re: Brewery Programming

Post by Matho » Wed May 23, 2012 10:45 pm

thanks guy's, I'm pleased with how it has turned out. I worked out a good way to make the front label, I used avery heavy duty printable labels code 936067. After I print it out I apply one coat of clear acrylic car paint, then roughly trim it up, put the label on and then trim it up with a razor. After that I apply another 2 coats of acrylic this helps seal the label to the box and makes it water proof.
The label has proven it self over the last 6 months it has got wet and dirty and cleans off really easily.

cheers steve

Fil
Telling imaginary friend stories
Posts: 5229
Joined: Sun Oct 16, 2011 1:49 pm
Location: Cowley, Oxford

Re: Brewery Programming

Post by Fil » Sat May 26, 2012 4:21 pm

my initial plan to power my controller was flawed.
I dont have a 32a power supply just access to 13a ring mains.

my controller can be powering upto 2 kettle elements at any given time.

I was planning on joining the feeds from 2 ring mains within the box to create a high amp rail, ive been informed that this is stupid and a recipe for disaster.. which is why i checked before i started the build.

So... i can group the ssrs to control the elements into 2 banks. and feed each bank from its own independant electricity supply from a seperate ring main. system logic can ensure that no more than one ssr driving an element can be on from either bank at any one time.

I will be fitting 6 ssrs for controlling kettle elements 4 will be controlled via my arduino solution, and 2 controlled by off the shelf pid controllers as a backup system.

a further 2 ssrs may be fitted for auxilary use, if i use a 240v pump rather than 12v solar pump for example or running lights for a late night patio brew.


so bank one of SSRs would contain PID1, HLT, Boiler1, Aux1 and bank 2 PID2.HERMS,Boiler2 and Aux2. allowing me to heat up the hlt and preheat the herms concurrently and also run 2 boiler elements concurently both fed from seperate mains rings , should an ssr fail the aux ssr in the bank can be utilised, and if the system fails cos of bad codeing the off the shelf controllers can be utilised.

can anyone advise if this is a safe way to proceed?
ist update for months n months..
Fermnting: not a lot..
Conditioning: nowt
Maturing: Challenger smash, and a kit lager
Drinking: dry one minikeg left in the store
Coming Soon Lots planned for the near future nowt for the immediate :(

Matho

Re: Brewery Programming

Post by Matho » Tue May 29, 2012 9:13 am

here in OZ most houses are wired up with two 16 or 20amp power circuits and one 8 or 10 amp light, the standard GPO ( powerpoint) is only rated at 10 amps so that limits most electric brewers to 2400w elements unless you want to spend a fair bit of money getting a dedicated power circuit run. There are a few guys down here that run a 22l brewery off 10 amps, it take a little bit of fiddling and a bit more time. Its all about time sharing, when the mash is ramping all of the power goes to the mash, once the mash has hit temp the power is switched to the HLT and only switched back to maintain the temp of the mash. When the mash is finished hopefully you have a HLT full of hot water at sparge temp so all the power can go to the kettle as soon as there is enough wort in the kettle to start the boil. This sort of setup takes more time but that can be reduced with insulated vessels and lids, if you can bring in 2 10 circuits even better.

I have been playing around with my controller a bit over the weekend and have found that I don't like how the PID worked, it over shot the temp too much and oscillated by 1 deg which I also didn't like this was the setup that I used

Image

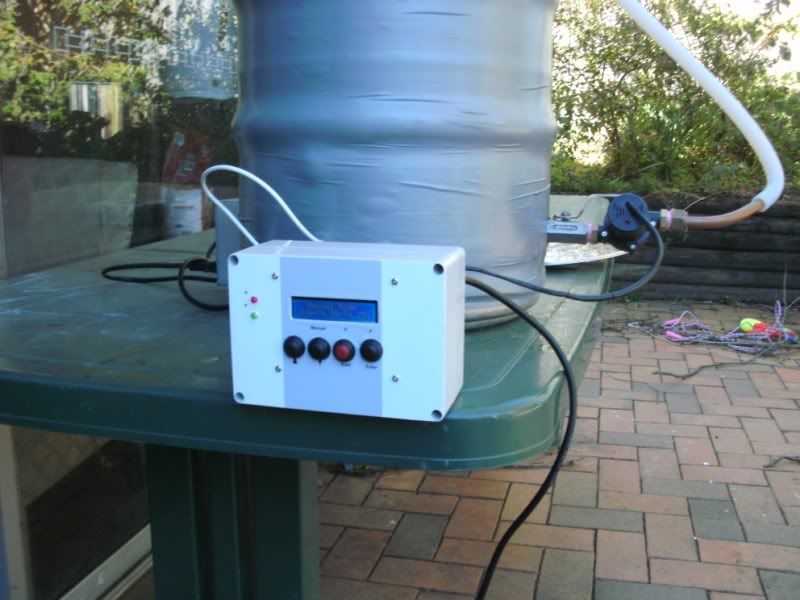
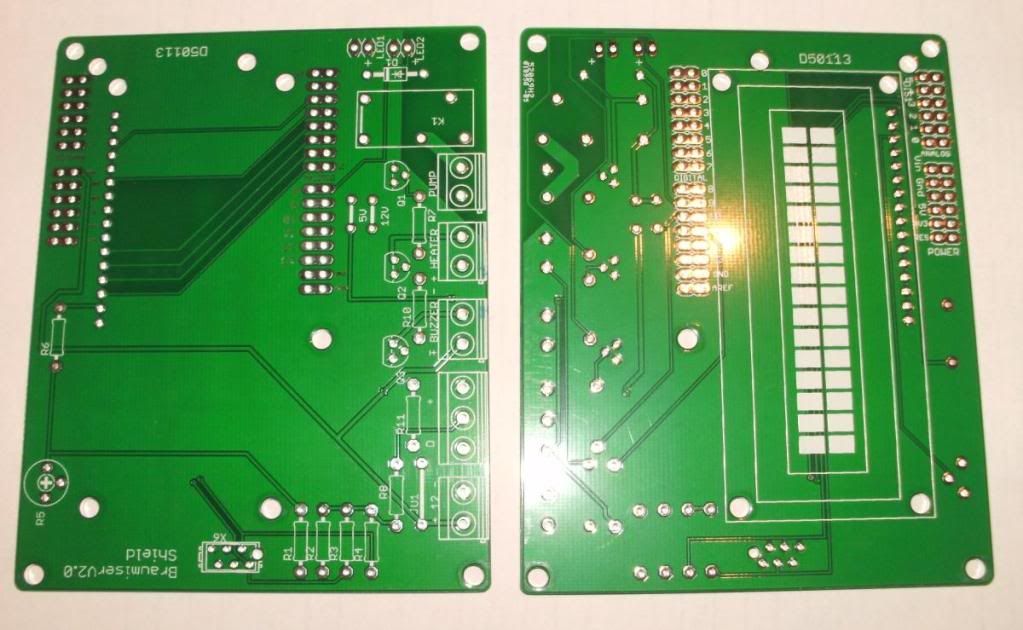
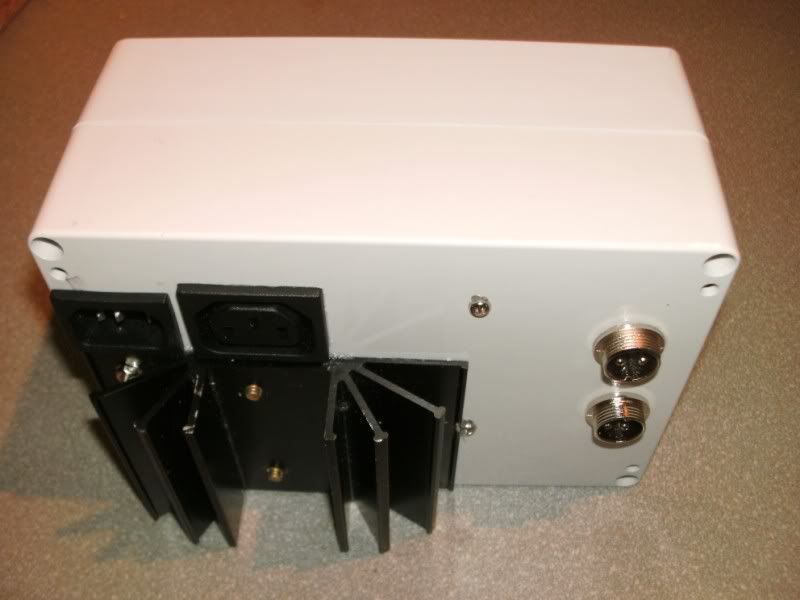
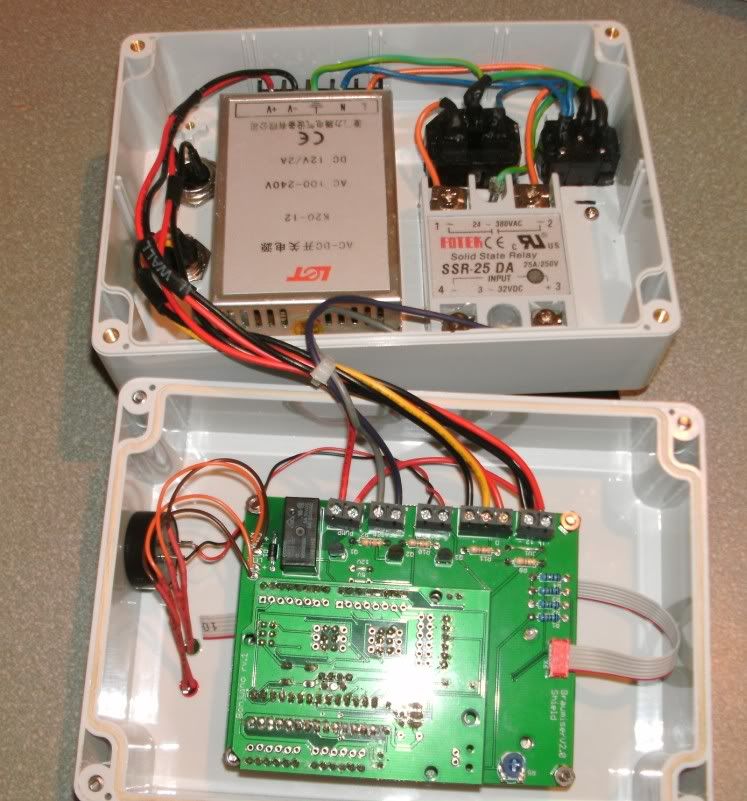
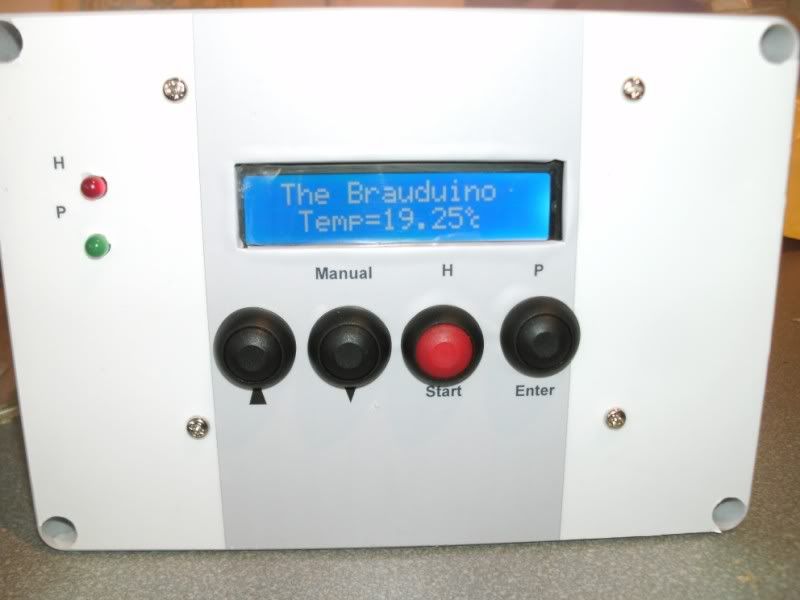
its a camping mat insulated keg with a 2400w kettle element and a little 15w 12v dc pump used to recirc the water to mix it.

Image

so after a little bit of thought I decided to hold the element on and leave the pid off until the temp is within 5 deg of the set temp then the PID takes over. What I don't like about the library is the I term is limited to the output max, which means it can ramp up to the output max and the only thing that will bring it down is an over temp. The d term isn't doing much because of the long ramp times, one could extend the sample time but that also increase the Ki and decreases the Kd if you extend it over a second. so this is what I did

Code: Select all

void PID_HEAT (void){
  if((Setpoint - Input)>5){
    digitalWrite(Heat,HIGH);
  }
  else{
  myPID.Compute();
  unsigned long now = millis();
  if(now - windowStartTime>WindowSize)
  {                                     //time to shift the Relay Window
    windowStartTime += WindowSize;
  }
  if((Output*(WindowSize/100)) > now - windowStartTime) digitalWrite(Heat,HIGH);
  else digitalWrite(Heat,LOW);
  }
}
I also increased the sampletime to 5 sec and limited the output to 100, the setting I ran today was Kp = 50, Ki = 0.01, Kd = 10 and window size = 500. what I found was the temp ramped up at a good rate and settled right on the set temp without any overshoot, the only issues was a messy changeover from ON to the PID and a slow response to temperature change under 2 deg ( this could be reduced by increasing Kp a bit), I have a few ideas on smoothing out the change over.

cheers steve

Post Reply