Plastic conical FV build - pics

The forum for discussing all kinds of brewing paraphernalia.
User avatar
Kev888
So far gone I'm on the way back again!
Posts: 7701
Joined: Fri Mar 19, 2010 6:22 pm
Location: Derbyshire, UK

Plastic conical FV build - pics

Post by Kev888 » Sun Jan 16, 2011 1:54 pm

A few weeks ago I got a plastic conical tank to convert into a FV, but flu and other stuff has meant I'm only now starting to do anything with it.

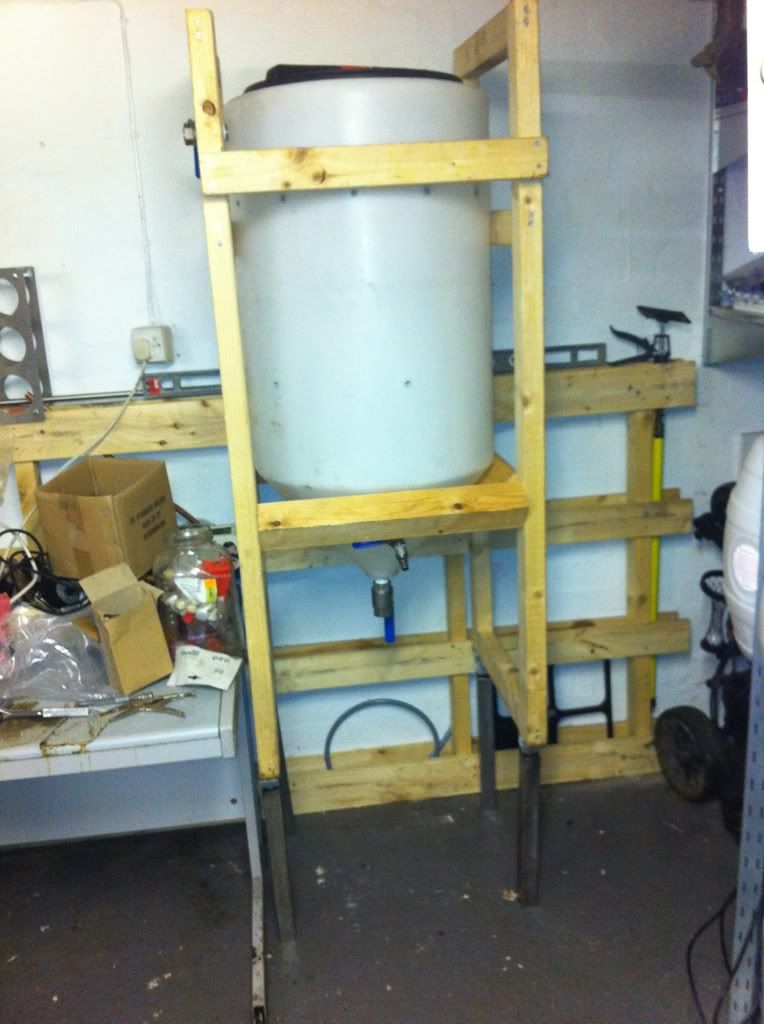
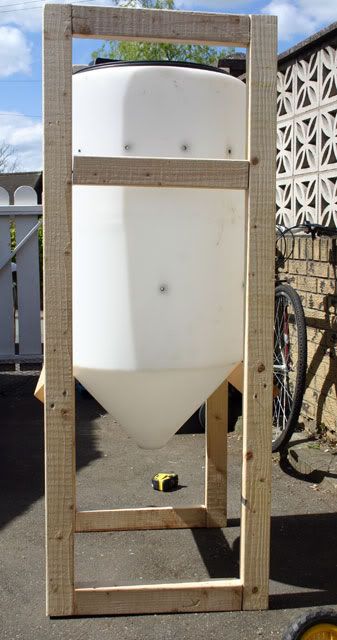
I took some more detailed pictures and described what the tank is like here but essentially it looks like this:
Image

The first step is to sort out a racking arm. I was intending to just repeat what Aleman did on his build, but things didn't conspire. I got a 1/2" BSP parallel nipple from BES but it was much shorter than it looked in the sketches they insist on using instead of photos, and I'd also overlooked that the 1/2"BSP nuts and olives fit 15mm pipe not half inch which is what I had.
Image

So on to Plan B. I ordered a 1/2" compression to 1/2"BSP bulkhead connector (at a slightly eye-watering £25). However whilst it would work for a bulkhead I found that sadly it won't really seal to one - the hex part is far too low profile and really needs to be a flange; any sealing washer or o-ring soft enough for a seal just squidged out over it when tightened.
Image

So having failed to find a flange nut with the odd 1/2" compression thread, I got some 3/4" stainless washers; the need now was to seal between the minimal hex bit and the washer - not helped by the recess between threads and hex, which let the washer slop about. So I got some 'universal' flux-covered brazing rods from B&Q and braized the washer on - just about, as my hand-held blow-torch could only just about do it even with mapp gas. It worked out surprisingly well though, and I later filled any gaps on the reverse side of the washer with LS-X.
Image
I'd got some 1/2" stainless tube (thanks again Garth!) and bent this in a pipe bender - a little un-neatly as I only have 15mm guides for it. After some testing I found the compression nut too fiddly (I can only get one arm inside the tank) and the pipe kept rotating in the fitting so I also braized the pipe in - the internal direction of the pipe now can't come out of register with the external bits, so i'll be able to mark the washer and always know where the internal pipe is. In theory the main racking arm assembly and most of the nuts can be just boiled in a saucepan or pressure cooker for sanitising.

Here is the arm with a rubber sealing washer on, and the internal washers and nuts laid out in order: a plastic washer to prevent scratching the tank wall, two stainless washers sandwiching a stainless spring washer to keep the rubber washer under compression, and a nut. The second/end nut isn't going to be used unless I find the first one rotates on the threads. If it does I'll grind off the flange of the second nut so it'll fit over the threads and use it just to butt up against the first. Possibly this is overkill, I may have been able to manage with the springiness in the rubber sealing washer rather than needing a spring washer, but my rubber washer hasn't got a lot of give in it - probably should have used a silicone one.
Image

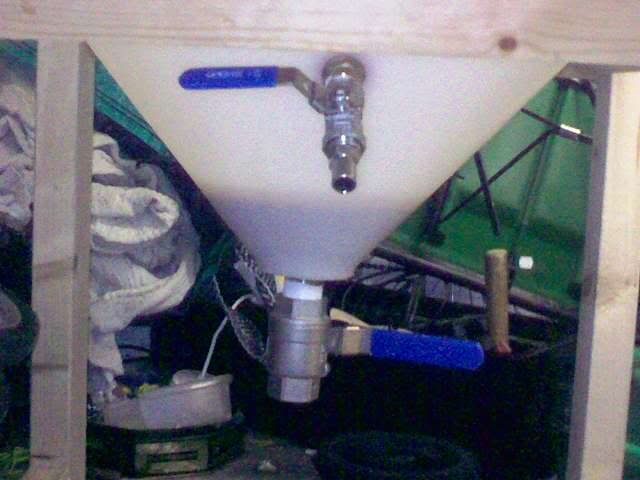
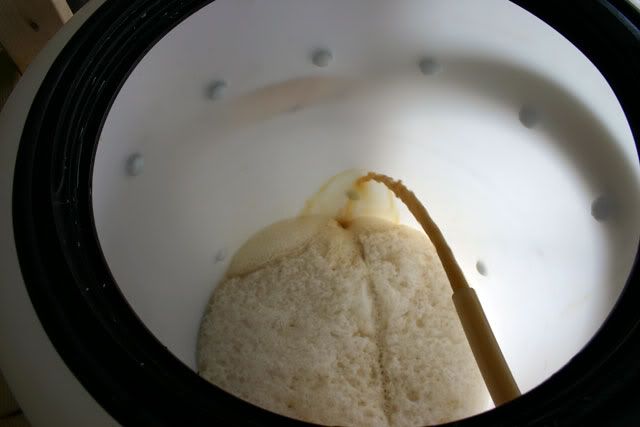
I had to fit the racking arm higher up the cone than I really wanted, as my arm isn't long enough to easily get much lower for disassembly/cleaning. So its going to be a sort of unconventional combined/rotating dip tube instead, and I'll use some silicone tube as a fine adjustment on height. Here it is inside horizontally (though I'd probably never use it rotated this high):
Image

And here it is pointing vertically downwards. I did a test and it'll drain down to about 2L deadspace as is, but obviously I can lower the silicone dip tube as i won't need clearance to rotate it all the way horizontal.
Image

Here is the outside 1/2"BSP thread - really should have cleaned up the washer better before photographing it! Its only external/cosmetic but there was quite a bit of flux residue that I only roughly scraped off:
Image

So thats it so far, taps, stand and lid still to sort. will post more as I go.

Cheers
Kev
Last edited by Kev888 on Mon Jan 17, 2011 7:18 pm, edited 3 times in total.
Kev

User avatar
Gricey
Under the Table
Posts: 1081
Joined: Sat Jul 03, 2010 9:07 pm
Location: Sheffield, UK
Contact:

Re: Plastic conical FV build - pics

Post by Gricey » Sun Jan 16, 2011 4:39 pm

Hardcore!
Bad Panda Brewery
Fermenting: FV1: AG#18 English IPA FV2: AG#19 Summer Dunkelweizen
Conditioning: AG#16 Chimay Reddish, AG#17 Amarillo Brillo
Maturing: AG#05 B.O.R.I.S.: Bricksh*tter Oatmeal Russian Imperial Stout - ready 01/10/11, AG#07 Monkey Shot! IAPA - ready 16/06/11 maybe
Drinking: AG#11, AG#14, AG#15
Planning: AG#20 Summer Hefeweisen, AG#21 Saison Brettre, AG#22 Simcoe Poisoning Red IPA, AG#23 Oatmeal Stout

User avatar
Kev888
So far gone I'm on the way back again!
Posts: 7701
Joined: Fri Mar 19, 2010 6:22 pm
Location: Derbyshire, UK

Re: Plastic conical FV build - pics

Post by Kev888 » Mon Jan 17, 2011 6:53 pm

Ha, yes well a bit more planning with the fittings may have made it less so :-)

I'm now thinking about the lid. The top is a bit pants for this type of thing so I'm going to widen the hole a bit, closer to the shoulder, making access easier and getting rid of the screw holes and wrinkled edges. A cloth over it would be fine for a primary FV but I'm thinking of leaving the beer in longer so really would like a more sealed arrangement that i can fit an airlock or breather tube to as you would with a secondary FV.
Image

HDPE isn't great to glue so the obvious thing would be to put screws through again - either lots of them or else use some sort of big internal ring/washer to avoid more wrinkling around them. But screws and holes seem like more to sanitise, and I could just cover it with a flat sheet of plastic on a soft squishy washer, like a bicycle inner tube or something - maybe with a weight if needed. Seems a bit crude, but I can't immediately think of a reason why not - can anyone see a problem with that?

Cheers
kev
Kev

JontyR

Re: Plastic conical FV build - pics

Post by JontyR » Mon Jan 17, 2011 7:57 pm

I know you're not keen on the drilling/screw option but maybe something along this line http://www.safety-marine.co.uk/Hatches- ... Dgodayf4GQ might be of use. The link is the 1st Google I did for 'dinghy hatch' you may find more suitable/bigger/cheaper with a bit of digging

Trunky

:)

Post by Trunky » Mon Jan 17, 2011 8:16 pm

:)
Last edited by Trunky on Thu Oct 27, 2011 7:55 pm, edited 1 time in total.

User avatar
Kev888
So far gone I'm on the way back again!
Posts: 7701
Joined: Fri Mar 19, 2010 6:22 pm
Location: Derbyshire, UK

Re: Plastic conical FV build - pics

Post by Kev888 » Mon Jan 17, 2011 9:40 pm

Thanks for the suggestions!
JontyR wrote:I know you're not keen on the drilling/screw option but maybe something along this line http://www.safety-marine.co.uk/Hatches- ... Dgodayf4GQ might be of use. The link is the 1st Google I did for 'dinghy hatch' you may find more suitable/bigger/cheaper with a bit of digging
I didn't even know that these existed! I need it to be a fair bit bigger but probably such things exist if these do, I'll look further into it - thanks.
Trunky wrote:If you want to go the "bicycle inner tube" route then Derek at Winegrowers will be able to supply an appropriate tube, see http://www.winegrowers.info/wine_equip/ ... 0tubes.htm I use them in my variable capacity tanks and they work a treat and with the right size/type of lid they can be retro-fitted to most tanks.
Ah, thats what I get for thinking I'd had a mildly new idea :-) They're a bit pricey as they get bigger, but probably much more suitable for food use than normal inner tubes. Hmm, thats another option actually, I was just going to lay it on the top, but I guess I could actually cut the whole top off the tank if I 'somehow' reinforced it externally, and use these in the way they were intended.

Excellent ideas, many thanks!

Cheers
kev
Kev

User avatar
Kev888
So far gone I'm on the way back again!
Posts: 7701
Joined: Fri Mar 19, 2010 6:22 pm
Location: Derbyshire, UK

Re: Plastic conical FV build - pics

Post by Kev888 » Thu Jan 20, 2011 5:41 pm

Right, its going into an unheated/unregulated garage so I can't be slack about getting the temperature control sorted. I'd intended to heat/cool the conical directly with heating mats and an immersed chiller-coil, Steve Flack stylee. However I'm dubious about using heat mats on a plastic tank that has a 55c max temperature rating, and am also continually failing to win a shelf cooler at a reasonable price/location.

But I've realised that I've already got most of whats needed to make a regulated cupboard for it instead, and it needs some sort of structure making to support the tank anyway. I could also make it larger than needed, to leave room for fermenting starters and other brews. Cooling is the challenging part, but luckily I got this basic portable aircon unit very cheaply at B&Q - they were being sold off at the end of last summer and this one was also a customer return :-):
Image
I did some research on a previous aircon project, and discovered that they're comparable with the efficiency of fridges, so with a small well insulated cupboard rather than a whole room it shouldn't cost much to run at all.

However there is an issue: this single-pipe type takes air from its environment (which it has just cooled) to blow the excess heat out down its vent. Which is inefficient and also means that warmer air would have to flow into the cupboard to replace that vented. Fortunately it appears to have separate intake grills for cooling and venting purposes, so with luck I could keep the cool air recirculating in a sealed (ish) cupboard and use external air to supply the venting.

Does that sound reasonable or can anyone spot anything I may be missing?

Cheers
kev
Kev

unclepumble

Re: Plastic conical FV build - pics

Post by unclepumble » Thu Jan 20, 2011 7:42 pm

There are plenty of chillers about if you keep an eye out, and stainless product coils are only about £8 from cornelius.

I have put mine in a wooden frame that will be insulated with kingspan, temp control will be via an PT100 in a thermowell with a twin relay PID one for cooling one for heat, heat will be via a tube heater from the local plumbers merchants, cooling controlled via 2 solenoid valves on the python loop of my chiller.

As for a racking arm, i thought about that one, and decided to just fit an nice plain stainless steel 1/2" tank fitting with a silicone washer between it and the inside wall of the conical, no need for a racking arm as two bricks under the rear of the frame once the level gets down low works a treat, and its not back breaking to tip up, (if you think reaching into the bottom of a 130ltr conical is hard try it with a 200ltr one)

When I get around to it I will be replacing the lid on mine for a stainless lid with a Sprayball in it and a Prv and AVV, so I can use it as a dual purpose Fermenting and low pressure conditioning vessel.

However I like to do things slowly 8)

For a better more hygenic outlet get in touch with Gordon Here

I have had two off him one inlet one for outlet and have been very happy with them.
Image
Image
Image
Image

UP

User avatar
Kev888
So far gone I'm on the way back again!
Posts: 7701
Joined: Fri Mar 19, 2010 6:22 pm
Location: Derbyshire, UK

Re: Plastic conical FV build - pics

Post by Kev888 » Fri Jan 21, 2011 1:17 pm

Thats really interesting, thanks! Its just the type of thing I was thinking of for the frame; filled with kingspan or celotex or something like that, and a CIP approach for the tank, though being paranoid about these things I'll probably dissassemble the fittings and boil them afterwards as well.

I can see that you'd have even more trouble reaching down to the cone with that size of tank - looks quite tall. I thought mine would be like that but fortunately its only just a bit too tall, so the 'more vertical than normal' racking arm makes it possible to get at, otherwise I would have had a static TC like yours as well.

I've been keeping my eye out on ebay and freecycle for a shelf cooler for many months, quite a few seem to go for about £70 or less but any that have been local enough or willing to post have so far only gone for more or less double that - probably they're worth it and I'm just a skinflint! But actually I've warmed to the idea (excuse the pun) of using the aircon unit which will cost me £0 and having a larger air-regulated cupboard, because I was needing to sort something out for making the starters and smaller experimental brews as well.

Thanks for the pics - may spur me on to sort it more quickly now! Pitty its so effing freezing out in the garage at the mo..

Cheers
Kev
Kev

beermonsta

Re: Plastic conical FV build - pics

Post by beermonsta » Fri Jan 21, 2011 9:14 pm

Kev, I'm not confident even the best air con will lower the air temp below 16'C - which is obviously sufficient for ale, but what if you want to try your hand at (excuse the dirty word) lager?
I've just got a brew in my new conical and are thinking along the same thought of yourself of how is best to cool/heat. I've decided I need to add a cornie post to the top of the lid so I can add a blanket cover of CO2 to the wort/beer as I draw off a sample or dump the trub/yeast to keep the O2 away!. Any ideas where to source the correct threaded nipple - I have a spare post.
I also have use a Maxi 110 with re-circ connected to a spare stainless product coil that I used on a previous brew - this worked a treat but I would rather have a system where I minimise the chance of infection/cleaning by cooling the surrounding air instead. So I too am thinking of building a simple frame like a partion/stud wall and then using insuallation foam. I would like to use the Maxi 110 but I'm not confident that a product coil inside the foam "cold fermenting space" would be sufficient. I then though about using a fridge heat exchanger (the ones on the outside with the coils surrouded with metal cooling fins). Then I though why not use the inside of the fridge and use the cooling pipes and metal plates on the inside of a fridge or freezer. Then I thought hell, why not find a fridge/freezer and break it into parts and reconstruct using the foam as the fridge shell. My only concern would be the use of an ATC800+ constantly cycling the coolant pump on and off as it trys to maintain temperature (even though I know it has a delay to prevent damage to the pump).

As for heating, the tube heater seem very popular, but this relys on convection and thus an uneven temperature in the enclosed cooling/heating space so I would prefer to spread the heat out evenly using a fan of sorts. Maybe a low powered heating fan would be ideal or the tube heater with a small computer fan to distribute the heat evenly.

Originally I was thinking of using a wooden floor under floor heater aka...
http://cgi.ebay.co.uk/ws/eBayISAPI.dll? ... K:MEWAX:IT
wrapped around the conical tank and then vertical pieces of 10 or 8mm copper pipe joined by flexible pipe running around the circumference of the tank, connected to the recirc of the maxi 110.

The insulate method is winning in my mind. Following your rotaing racking arm with interest as I might add on to mine in the future, but don't regard it as neccessary currently as I will dump from bottom valve, then rack from side valve, then whatever is left (I guess at 3-5 litres in the cone) can get dumped into my 9 litre baby cornie, get bottled, or straight into a spare pop bottle for a conditioning tester.
]Your/everybodys thoughts appreciated.

User avatar
Kev888
So far gone I'm on the way back again!
Posts: 7701
Joined: Fri Mar 19, 2010 6:22 pm
Location: Derbyshire, UK

Re: Plastic conical FV build - pics

Post by Kev888 » Sat Jan 22, 2011 11:48 am

I think you could well be right about aircon units not being so good for lager - although I don't know how cold they'll go if you bypass their controls. I've nothing against lager (the quality ones anyway) but I can't see myself wanting to make it as ales are my thing really. It is possible that I'd still miss out on not being able to crash-cool enough though. And thats also one of the trade-offs with my current plan; I can use the same cooling/heating system in a larger cupboard for starters and other brews at the same time, but I wouldn't be able to individually change the temperature for the conical without affecting them all.

Hmm, you have me thinking now - often a bad sign... I didn't fancy dissassembling a fridge, but did consider taking the top off my current fermenting fridge and building it into the base of a taller FV cupboard. I was mainly going with the aircon unit instead because I think it would also work well (for ales) in a large-ish cupboard, whilst the fridge would be good for making a keggorator later, but maybe thats a bad economy; crash cooling and individual control of the conical are appealing...

Up until now I'd just intended to not disturb the CO2 blanket and let it fall with the beer level, but I like the idea of the cornie post, could be useful during phases of less vigorous CO2 production. I looked into thread sizes of the posts before though - they're unusual and I couldn't find anything at all to fit. But you wouldn't need to actually pressurise the FV, at least not one like mine (I know some metal ones can be pressurised to rack without gravity), you'd just need to squirt in the gas, so maybe something simpler would do.

It sounds like you have the choice of beer cooler or fridge based cupboard. I don't know which is best but probably both would work pretty much as well. I really like what Steve Flack did (Cooling Heating Controller Unit Insulation). I'd even thought about using the chiller externally by wrapping a long coil of beer line around the outside of the FV instead - if then insulated I can't see why it wouldn't work, although I've not actually seen it done to verify that. But was put off direct heating by the 55c rating of my plastic tank, and thought the controlled cupboard may be safer for this.

Until I try it I'm not sure how much use the rotating bit of my racking arm will be, but when it looked like I may not be able to reach far enough I considered a fixed outlet permanently sealed in. IIRC then as unclepumble's post above the verdict from the forum seemed to be that the rotating aspect is nice but that a fixed one would still be effective.

Cheers
Kev
Kev

User avatar
Kev888
So far gone I'm on the way back again!
Posts: 7701
Joined: Fri Mar 19, 2010 6:22 pm
Location: Derbyshire, UK

Re: Plastic conical FV build - pics

Post by Kev888 » Sun Jan 23, 2011 2:21 pm

Right, thanks for the thoughts beermonsta - I've changed my plan a bit now. I'm still going to go with a controlled insulated cupboard but now its going to be dedicated to the conical, which in turn means I can crash cool it without affecting other brews. Sadly it also means another cupboard will be needed for starters and other brews, but I decided after all this effort I shouldn't lose the flexibility of controlling the conical individually.

I think the fridge would be more suitable than the aircon unit for crash cooling (and lager should the mood take me in the future), so I'll use this and just have to get another one for my keggorator project later in the year. I'm planning to take its top and door off and have it sitting in the bottom of the cupboard (with its hot bits poking out a sealed hole in the back wall). Maybe I'll have a fan to circulate air too:
Image
(sorry for the poor picture)

It doesn't seem to need much more alteration to the fridge to make this work, so should it fail (it is a freecycle special after all) it shouldn't be too much aggro to replace it. I'll make the cupboard wide enough to fit most standard fridges.

The height of my garage is limited otherwise I'd have the cupboard taller; as it is there won't be room to lift the conical out and I don't want to be tipping it with the fridge in so I'm intending to mount the tank in a metal shelf affair that can be horizontally slid in and out (when the conical is empty anyway) for access should I need to. One feature of using a cupboard is that the conical itself will remain just a stand-alone light plastic tank without wires/tubes etc so I'd like to keep that advantage amd make it quick and easy to get at.

Cheers
Kev
Kev

beermonsta

Re: Plastic conical FV build - pics

Post by beermonsta » Sun Jan 23, 2011 9:25 pm

Hi Kev, yes I'm thinking on a similar design myself. I'm going to try to source a freezer at first - I reckon it won't be too difficult to dissassemble and put the cooling plate/tubes on the inside of the insulation and the heat radiator on the outside. The compressor I'm thinking would fit neatly imbetween the conical legs to save space, with a layer of insulation above it to seperate it from the conical tank.
I like what Jim did here...viewtopic.php?f=6&t=15172&hilit=cabinet but I think I can decrease the footprint so that the fridge parts isn't a wasted space if you see what I mean.
Incorporating a fan makes good sense to me as whether you are heating or cooling, distributing the air around evenly will create a more even temperature and limit temperature gradients. Heating is the easy part as you could use a lightbulb, tube heater, or my favourite a CHE (ceramic heat emitter) - which would be better for you as it produces no light output to cause light strike through the opaque plastic.
Out of interest I did think about another option for you. If you wish to have a keggorator or starter cupboard, why not bolt another frame next to the one you will house the conical in. Install a small fan in a hole imbetween the two cupboards so and use an ATC 800 or equivalent to blow cold air through when required. This obviously requires the thing that demand the coolest temperatures to be the one with the main fridge unit in it.
Also been looking into insulating the thing. It would seem that the best material to use is cellotex or kingspan as it has good U -values and is closed cell and firerated - the downside is it is expensive. The other choice would be polystyrene - but you would need 50% more in terms of thickness for the equivalent insulation properties - but hey its cheap as chips!
I've looked into other products such as expanding foam - no go as once it's gone through it's initial expasion it will still double - and force whatever two sheets you are using to maker a cavity, apart. Everything else would need mega thick layers to have the same level of insulation.

Any ideas as to what would be a sensible amount of thickness to use? In reality most freezers or heaters I reckon will easily maintain a temperature even inside a plywood box but they would be on all the time and consume a lot of 'lecci. Given the worst case scenario of largering at 0'C in the summmer with a 30'C shed temperature whats a good amount - any heat engineers who could work it out? - I bet there is an equation - I'd rather not guess and end up having to double the thickness at a later date!
Keep the ideas/research coming - many heads are better than one, standing on shoulders of giants ...etc etc

User avatar
Aleman
It's definitely Lock In Time
Posts: 6132
Joined: Sun Jun 03, 2007 11:56 am
Location: Mashing In Blackpool, Lancashire, UK

Re: Plastic conical FV build - pics

Post by Aleman » Mon Jan 24, 2011 11:34 am

I'd go with 50mm which seems to be the thickness of most fridge walls . . . Freezers look to be using 75mm these days.

Beermonsta . . .be very careful when thinking about a freezer Chest freezers have a coil wrapped round all 4 walls . . .very difficult to dismantle, and a lot of uprights feed coolant through the 'shelves' that the baskets / feed sit on . . . again being very difficult to dismantle and use.

A fridge with a single coolant plate on the back wall is easiest to take apart and incorporate into a fermenting cupboard . . . those with an 'icebox' can also be used as it is possible, with care, to bend the icebox back from its 'U' shape into a flat plate

boingy

Re: Plastic conical FV build - pics

Post by boingy » Mon Jan 24, 2011 12:05 pm

Aleman wrote:.. those with an 'icebox' can also be used as it is possible, with care, to bend the icebox back from its 'U' shape into a flat plate
That's exactly what I did with a freecycle fridge except I found I only needed to "unbend" the icebox such that the top and bottom parts were at right angles to each other. I then attached it to the rear and one side of the fridge. I was going to attach it to the roof and back of the fridge but the way the pipes fell most naturally meant that attaching it to the side was the least stress way. I originally planned to make it completely flat but cowardice won over in the end.

The big fear with this stuff is that a pipe or channel will split and all that precious coolant will boil away, leaving you with only a chunky white cupboard. Re-gassing a fridge is not easy without specialist equipment (or a mate in the business) although I did ponder whether it would be possible to bodge on one of those filling valves from car air-con systems and refill with aircon cooolant. Here be dragons!

I think the best fridges are the older and lower-tech ones. Mine had only the compressor, the "dump the heat" matrix on the rear and the single pipe flowing through the icebox and back to the compressor. It would have been pretty easy to cut away the entire fridge body without damaging any of the cooling system. I could not say the same thing about the modern Hotpoint all-singing, all-dancing fridge in our kitchen. There are no visible cooling elements/channels/pipes anywhere inside it so you would have to start cutting just to find out where the pipes run.

Post Reply