Stir Plate wiring - Now Complete

The forum for discussing all kinds of brewing paraphernalia.
Post Reply
User avatar
Cpt.Frederickson
Hollow Legs
Posts: 454
Joined: Wed Jul 04, 2012 7:54 pm
Location: BIAB in the Shed, Maidstone, Kent

Stir Plate wiring - Now Complete

Post by Cpt.Frederickson » Sun Dec 23, 2012 5:30 pm

I'm soon to embark on constructing my DIY stir plate but wondered if you guys could tell me if i'm on the right lines or not, specifically with the wiring...

Image

I managed to get a fan with a variable speed switch built in off fleabay and I want to add an on off switch and socket for my DC adaptor.

Two things;
1. Is the wiring correct?
2. Are these the right components?
http://www.maplin.co.uk/2.1mm-single-ho ... ocket-1407
http://www.maplin.co.uk/dpdt-toggle-switch-2355
Last edited by Cpt.Frederickson on Sun Apr 06, 2014 7:01 pm, edited 4 times in total.
The Hand of Doom Brewery and Meadery
Fermenting -
Conditioning - Meads - Raspberry Melomel yeast test, Vanilla Cinnamon Metheglyn, Orange Melomel.
Drinking - Youngs AAA Kit; Leatherwood Traditional Mead, Cyser, Ginger Metheglyn.
Planning - Some kits until I can get back to AG, then a hoppy porter, Jim's ESB, some American Red.

User avatar
Befuddler
Even further under the Table
Posts: 2472
Joined: Sat Dec 19, 2009 2:06 pm
Location: Edinburgh

Re: Stir Plate wiring

Post by Befuddler » Sun Dec 23, 2012 6:14 pm

On a standard PC fan, the red wire is 5v. You want to connect to the yellow wire, which is 12v.

You only need a SPST switch (simple on/off switch with 2 contacts). The DPDT will have 6 contacts, but it will do the job, if you just wire 2 of the pins (a middle pin, and one of the end pins on the same side).

I can't tell you if the DC socket is right, because I don't know what connector your power supply has. :P
"There are no strong beers, only weak men"

tazuk

Re: Stir Plate wiring

Post by tazuk » Sun Dec 23, 2012 6:41 pm

have a look here this how i did mine :D

http://www.thehomebrewforum.co.uk/viewt ... 23&t=32897

Belter

Re: Stir Plate wiring

Post by Belter » Sun Dec 23, 2012 8:27 pm

Befuddler wrote:On a standard PC fan, the red wire is 5v. You want to connect to the yellow wire, which is 12v.

You only need a SPST switch (simple on/off switch with 2 contacts). The DPDT will have 6 contacts, but it will do the job, if you just wire 2 of the pins (a middle pin, and one of the end pins on the same side).

I can't tell you if the DC socket is right, because I don't know what connector your power supply has. :P

Red is positive +12v. yellow is the 'tacho'

http://www.pcbheaven.com/wikipages/How_PC_Fans_Work/

User avatar
Befuddler
Even further under the Table
Posts: 2472
Joined: Sat Dec 19, 2009 2:06 pm
Location: Edinburgh

Re: Stir Plate wiring

Post by Befuddler » Sun Dec 23, 2012 8:35 pm

Belter wrote:
Befuddler wrote:On a standard PC fan, the red wire is 5v. You want to connect to the yellow wire, which is 12v.

You only need a SPST switch (simple on/off switch with 2 contacts). The DPDT will have 6 contacts, but it will do the job, if you just wire 2 of the pins (a middle pin, and one of the end pins on the same side).

I can't tell you if the DC socket is right, because I don't know what connector your power supply has. :P

Red is positive +12v. yellow is the 'tacho'

http://www.pcbheaven.com/wikipages/How_PC_Fans_Work/
I was on about a molex connector actually. Since his fan has a switched speed control, I assumed that's what we were dealing with (those switches work by combining the 12v, 5v and ground rails in different combinations).

If it's a small 3-pin fan header, the middle one (usually, but not always red) is the 12v. If it's a 4-pin fan header, 12v could be yellow or red; it'll be the wire next to the black one. If it's a molex (which it almost certainly is), the yellow one is 12v.

Issue successfully muddled. #-o
"There are no strong beers, only weak men"

User avatar
Cpt.Frederickson
Hollow Legs
Posts: 454
Joined: Wed Jul 04, 2012 7:54 pm
Location: BIAB in the Shed, Maidstone, Kent

Re: Stir Plate wiring

Post by Cpt.Frederickson » Mon Dec 24, 2012 12:52 am

Thanks for the replies guys.

The fan is one of these if it helps;

http://www.ebay.co.uk/itm/0-761345-7502 ... 35c235cf6e

Its got two main wires, black and red respectively. There is a third smaller wire with a seperate connector which i assume is for attaching to a motherboard so you can monitor output.

I'm no electronics wiz, so I wanted a simple way of wiring a basic on off switch as well as an 'in' for a 12v DC adaptor
The Hand of Doom Brewery and Meadery
Fermenting -
Conditioning - Meads - Raspberry Melomel yeast test, Vanilla Cinnamon Metheglyn, Orange Melomel.
Drinking - Youngs AAA Kit; Leatherwood Traditional Mead, Cyser, Ginger Metheglyn.
Planning - Some kits until I can get back to AG, then a hoppy porter, Jim's ESB, some American Red.

Belter

Re: Stir Plate wiring

Post by Belter » Mon Dec 24, 2012 9:26 am

Cpt.Frederickson wrote:Thanks for the replies guys.

The fan is one of these if it helps;

http://www.ebay.co.uk/itm/0-761345-7502 ... 35c235cf6e

Its got two main wires, black and red respectively. There is a third smaller wire with a seperate connector which i assume is for attaching to a motherboard so you can monitor output.

I'm no electronics wiz, so I wanted a simple way of wiring a basic on off switch as well as an 'in' for a 12v DC adaptor

wow! that's a costly stir plate fan. I think mine was £1.98. hope your enclosure is transparent so you can see it

I'm pretty damn sure your wiring diagram should work if it were me I'd set it to full speed and put a pot in series with the positive. alternatively id follow Highlanders advice and put it on an LM317 and have complete accurate control of your speed if you have a clue about soldering. seems like you do if you're soldering a socket into your setup.

User avatar
Cpt.Frederickson
Hollow Legs
Posts: 454
Joined: Wed Jul 04, 2012 7:54 pm
Location: BIAB in the Shed, Maidstone, Kent

Re: Stir Plate wiring

Post by Cpt.Frederickson » Mon Dec 24, 2012 10:03 am

Haha, fortunately mine cost a fiver! I guess I'll have a go with this wiring setup, hopefully it'll do the job. Fortunately, I'm ok with soldering as it goes. As long as the bits are in the right place...
The Hand of Doom Brewery and Meadery
Fermenting -
Conditioning - Meads - Raspberry Melomel yeast test, Vanilla Cinnamon Metheglyn, Orange Melomel.
Drinking - Youngs AAA Kit; Leatherwood Traditional Mead, Cyser, Ginger Metheglyn.
Planning - Some kits until I can get back to AG, then a hoppy porter, Jim's ESB, some American Red.

User avatar
Cpt.Frederickson
Hollow Legs
Posts: 454
Joined: Wed Jul 04, 2012 7:54 pm
Location: BIAB in the Shed, Maidstone, Kent

Re: Stir Plate wiring

Post by Cpt.Frederickson » Thu Jan 03, 2013 4:17 pm

So, after a false start and being too busy with the missus and baby (as well as darts and beers with my brother...) I wired this up today. Worked perfectly!
Now just to work on the case for it...

In the end I went for these parts:
Toggle Switch (Sub Min Toggle A)
DC Socket

I was surprised how easy it was to be honest, my old tech lessons came back to me I guess...I think that keeping it simple was definitely a good idea as it does all I need and for those of us with limited knowledge/ability it is quite easily achievable. Now just to wait for my magnets to turn up and jobs a good 'un!
The Hand of Doom Brewery and Meadery
Fermenting -
Conditioning - Meads - Raspberry Melomel yeast test, Vanilla Cinnamon Metheglyn, Orange Melomel.
Drinking - Youngs AAA Kit; Leatherwood Traditional Mead, Cyser, Ginger Metheglyn.
Planning - Some kits until I can get back to AG, then a hoppy porter, Jim's ESB, some American Red.

User avatar
Cpt.Frederickson
Hollow Legs
Posts: 454
Joined: Wed Jul 04, 2012 7:54 pm
Location: BIAB in the Shed, Maidstone, Kent

Re: Stir Plate wiring

Post by Cpt.Frederickson » Sun Mar 03, 2013 4:01 pm

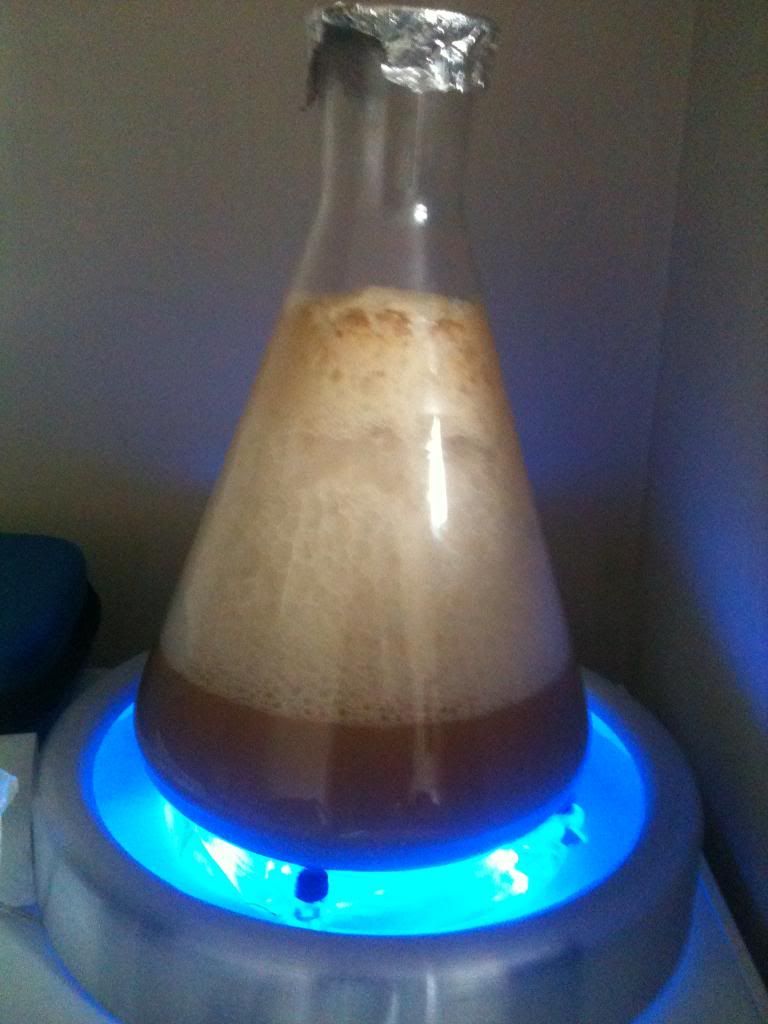
Finally got around to finishing this up and am putting it to good use today.
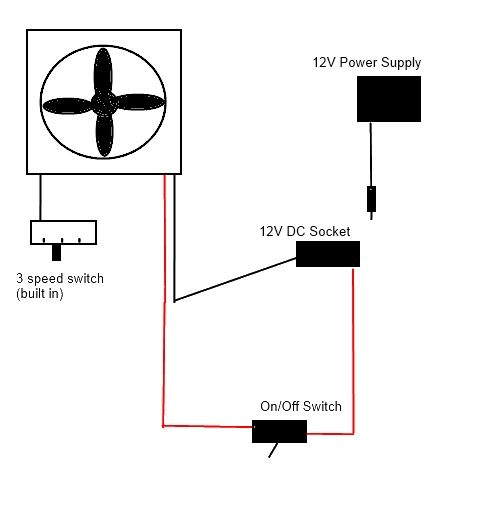
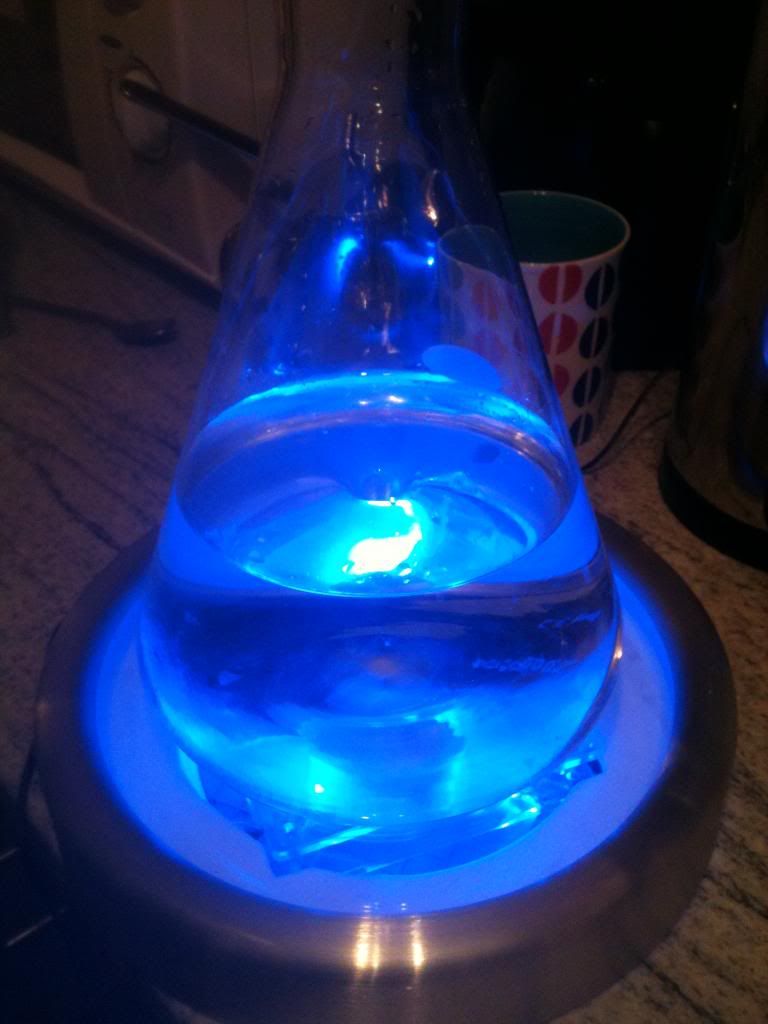
Bought a clock from Aldi for a few quid, tore the guts out and used it for the body. All the gubbins with the fan is wired up and working and with the help of the Dremel are securely fitted. Just need to mount the switch and the socket in the body, then its fully complete. That'll have to wait though, as I needed a starter to get my yeast kicking ready for my latest mead (as the first pitch never woke up).
Here's hoping that this one has more luck!

Image
Last edited by Cpt.Frederickson on Sun Apr 06, 2014 7:00 pm, edited 1 time in total.
The Hand of Doom Brewery and Meadery
Fermenting -
Conditioning - Meads - Raspberry Melomel yeast test, Vanilla Cinnamon Metheglyn, Orange Melomel.
Drinking - Youngs AAA Kit; Leatherwood Traditional Mead, Cyser, Ginger Metheglyn.
Planning - Some kits until I can get back to AG, then a hoppy porter, Jim's ESB, some American Red.

Belter

Re: Stir Plate wiring

Post by Belter » Sun Mar 03, 2013 4:30 pm

Nice job! Like the blue neon effect

User avatar
Cpt.Frederickson
Hollow Legs
Posts: 454
Joined: Wed Jul 04, 2012 7:54 pm
Location: BIAB in the Shed, Maidstone, Kent

Re: Stir Plate wiring

Post by Cpt.Frederickson » Sun Mar 03, 2013 4:36 pm

Cheers! Thought I might as well get one of the LED ones, shiny things and all ;)

Image
The Hand of Doom Brewery and Meadery
Fermenting -
Conditioning - Meads - Raspberry Melomel yeast test, Vanilla Cinnamon Metheglyn, Orange Melomel.
Drinking - Youngs AAA Kit; Leatherwood Traditional Mead, Cyser, Ginger Metheglyn.
Planning - Some kits until I can get back to AG, then a hoppy porter, Jim's ESB, some American Red.

Post Reply